MOD GUIDE: SOLAR-POWERED GAME BOY POCKET
This summer, as part of our activities with the Residual Media Depot, Michael Iantorno and I are modding several videogame consoles while closely documenting our work. The goal of this project is to create a series of succinct, approachable modding guides that detail the tools and techniques needed for hardware modding.
sOLAR-POWERED GAME BOY POCKET
This modding project is an adaptation of the solar-powered Game Boy Pocket mod developed by the Houston Museum of Natural Science. We first completed it as part of a Solar Media Collective workshop in 2022 and later repeated it as a class activity for Mess & Methods—a course we co-instructed as part of Concordia University’s summer institute.
Simply put, this mod replaces a Game Boy Pocket’s AAA battery slot with a lithium battery that can be charged using a rear-mounted solar panel. The end result is a Game Boy that can be operated without disposable batteries by trickle charging in sunlight. While the soldering expertise required for this mod is fairly low, it requires skill to cleanly carve out enough space in the Game Boy to add all the necessary components. Unfortunately, we have yet to complete this mod without the handheld turning out a bit bloated due to an influx of new parts.
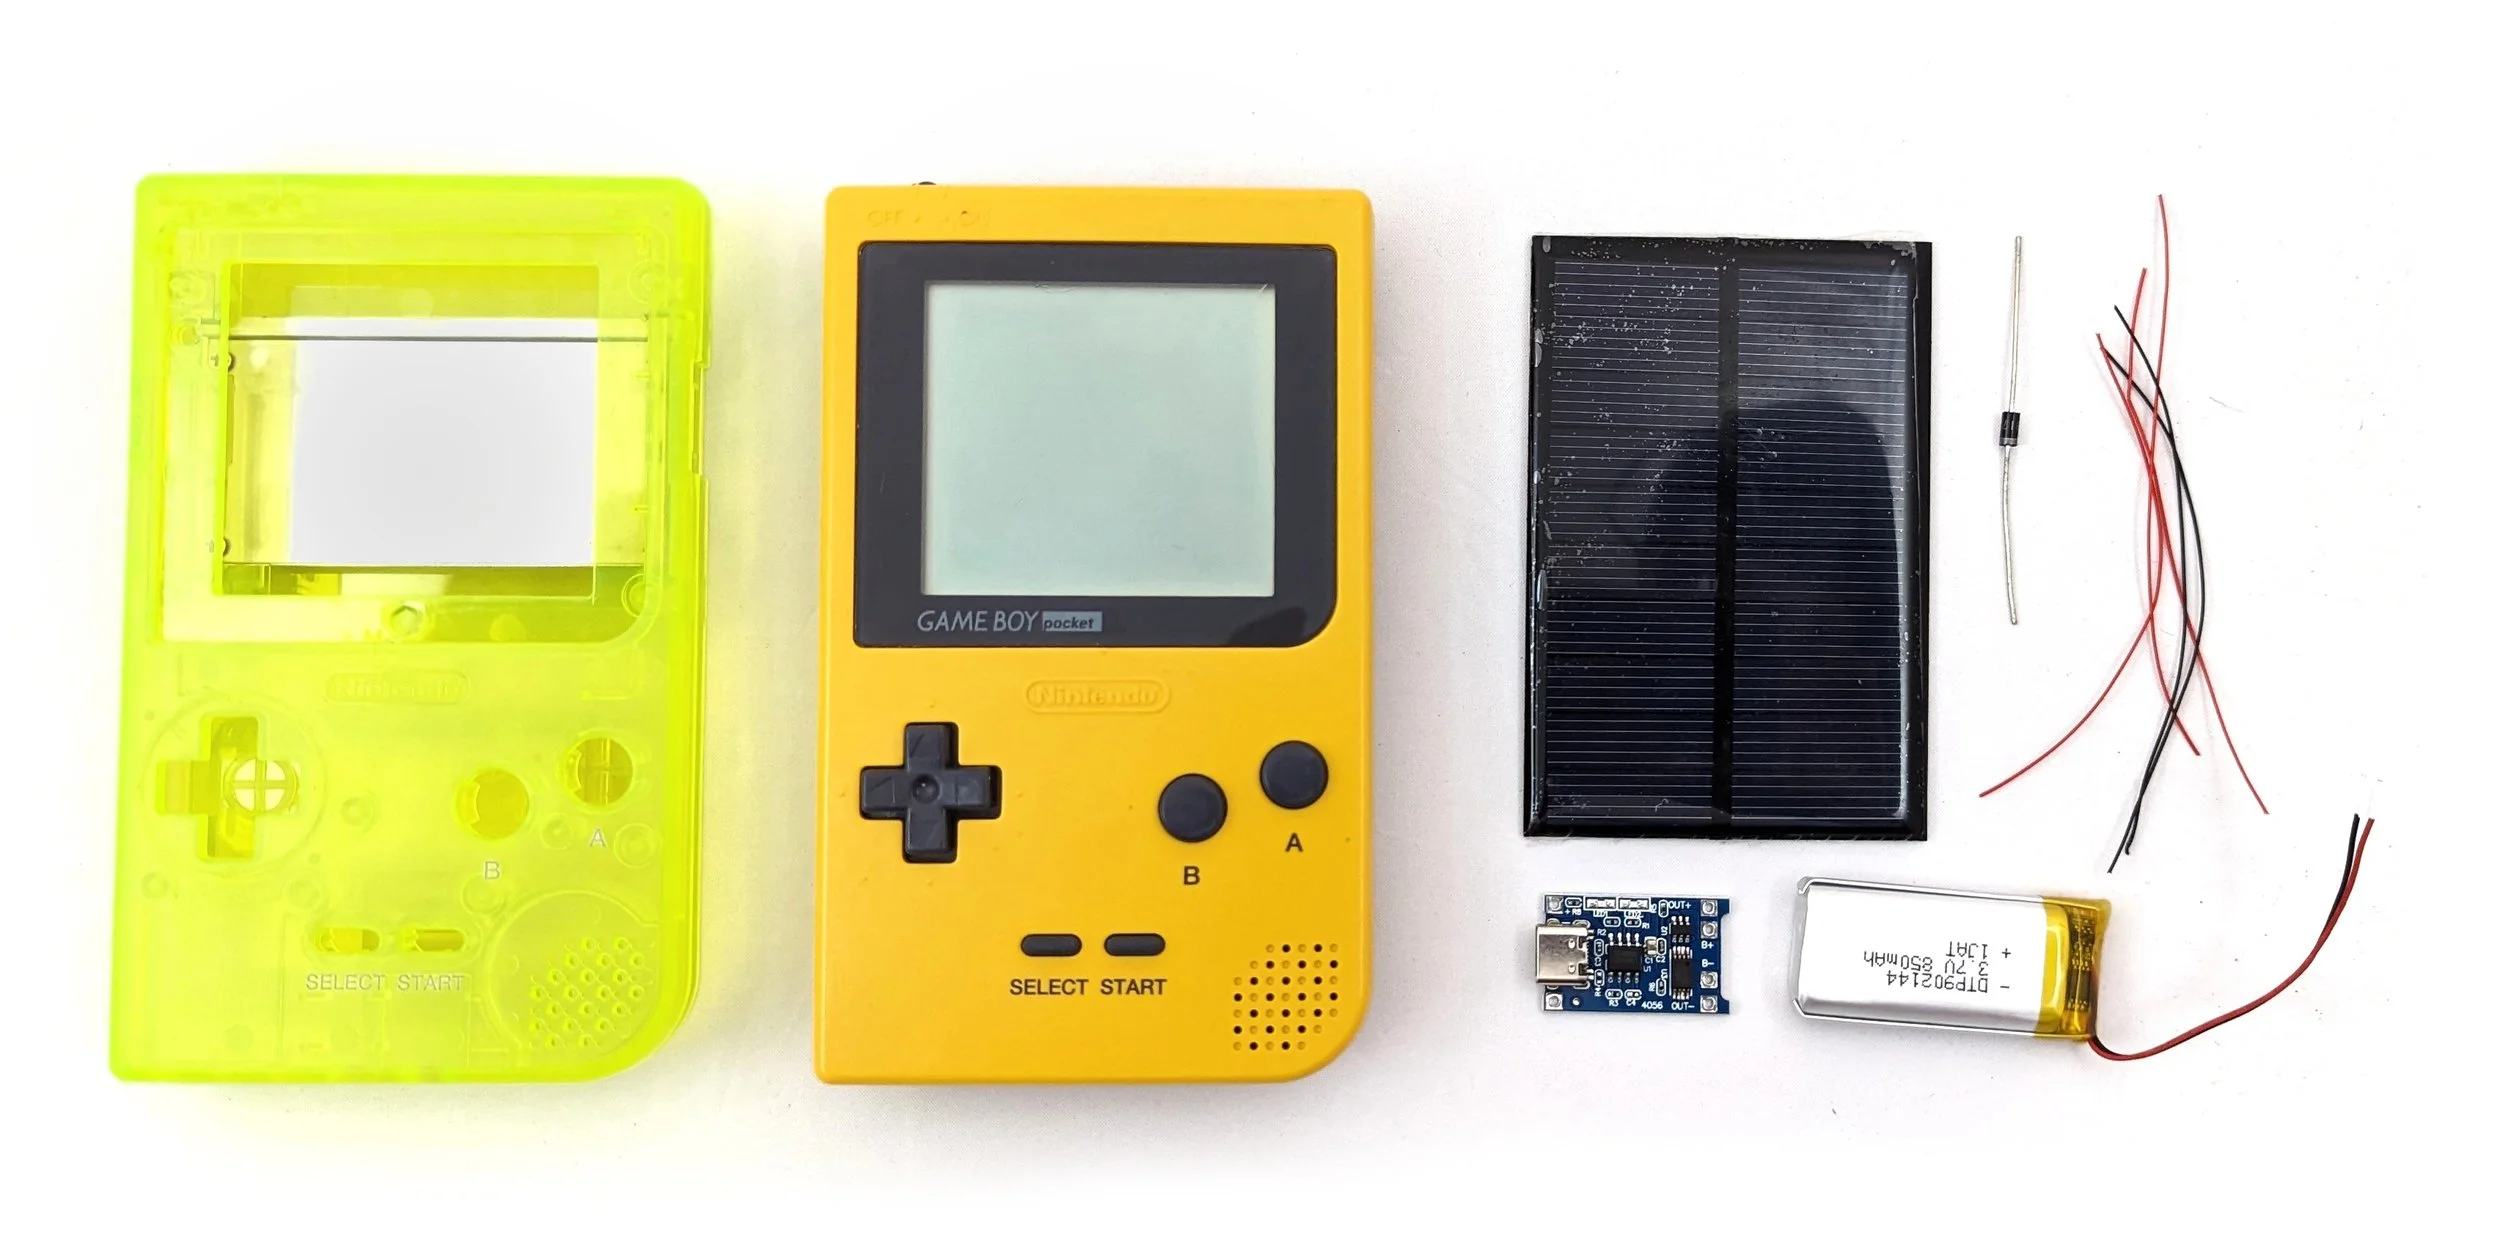
As this mod does not use a pre-made kit, you’ll have to source individual materials. The most finicky of these is likely the solar panel, as it will need to fit more-or-less perfectly on the back of the Game Boy Pocket.
Materials
Game Boy Pocket
Game Boy Pocket aftermarket shell (optional)
5v, 150ma solar panel (as close to 6x9cm as possible)
1a, 20v diode
3.7V LiPo battery (800-1000maH)
3.7V charge controller
Double-sided tape
Kapton tape
Tri-Wing and Philips Head screwdrivers
Dremel with disc and sander attachments
Flush cutters
Superglue
Soldering iron
Solder
Wire
Wire strippers
Heat-shrink tubing
Drill (recommended)
Kapton tape
Cotton swabs and isopropyl alcohol
Compressed air
“Tri-Wing screwdrivers are specifically designed to open up anti-tamper screws on home electronics. You can buy them numerous places online, but we recommend an iFixit Kit.”
Step 1: Disassemble the Game Boy Pocket
As with most mods, we start by taking the Game Boy Pocket apart. Using the Tri-Wing screwdriver, remove the six screws marked in the photo below. Note that the bottom two will require you to remove the battery door to access. Carefully remove the back half of the shell and set it aside.
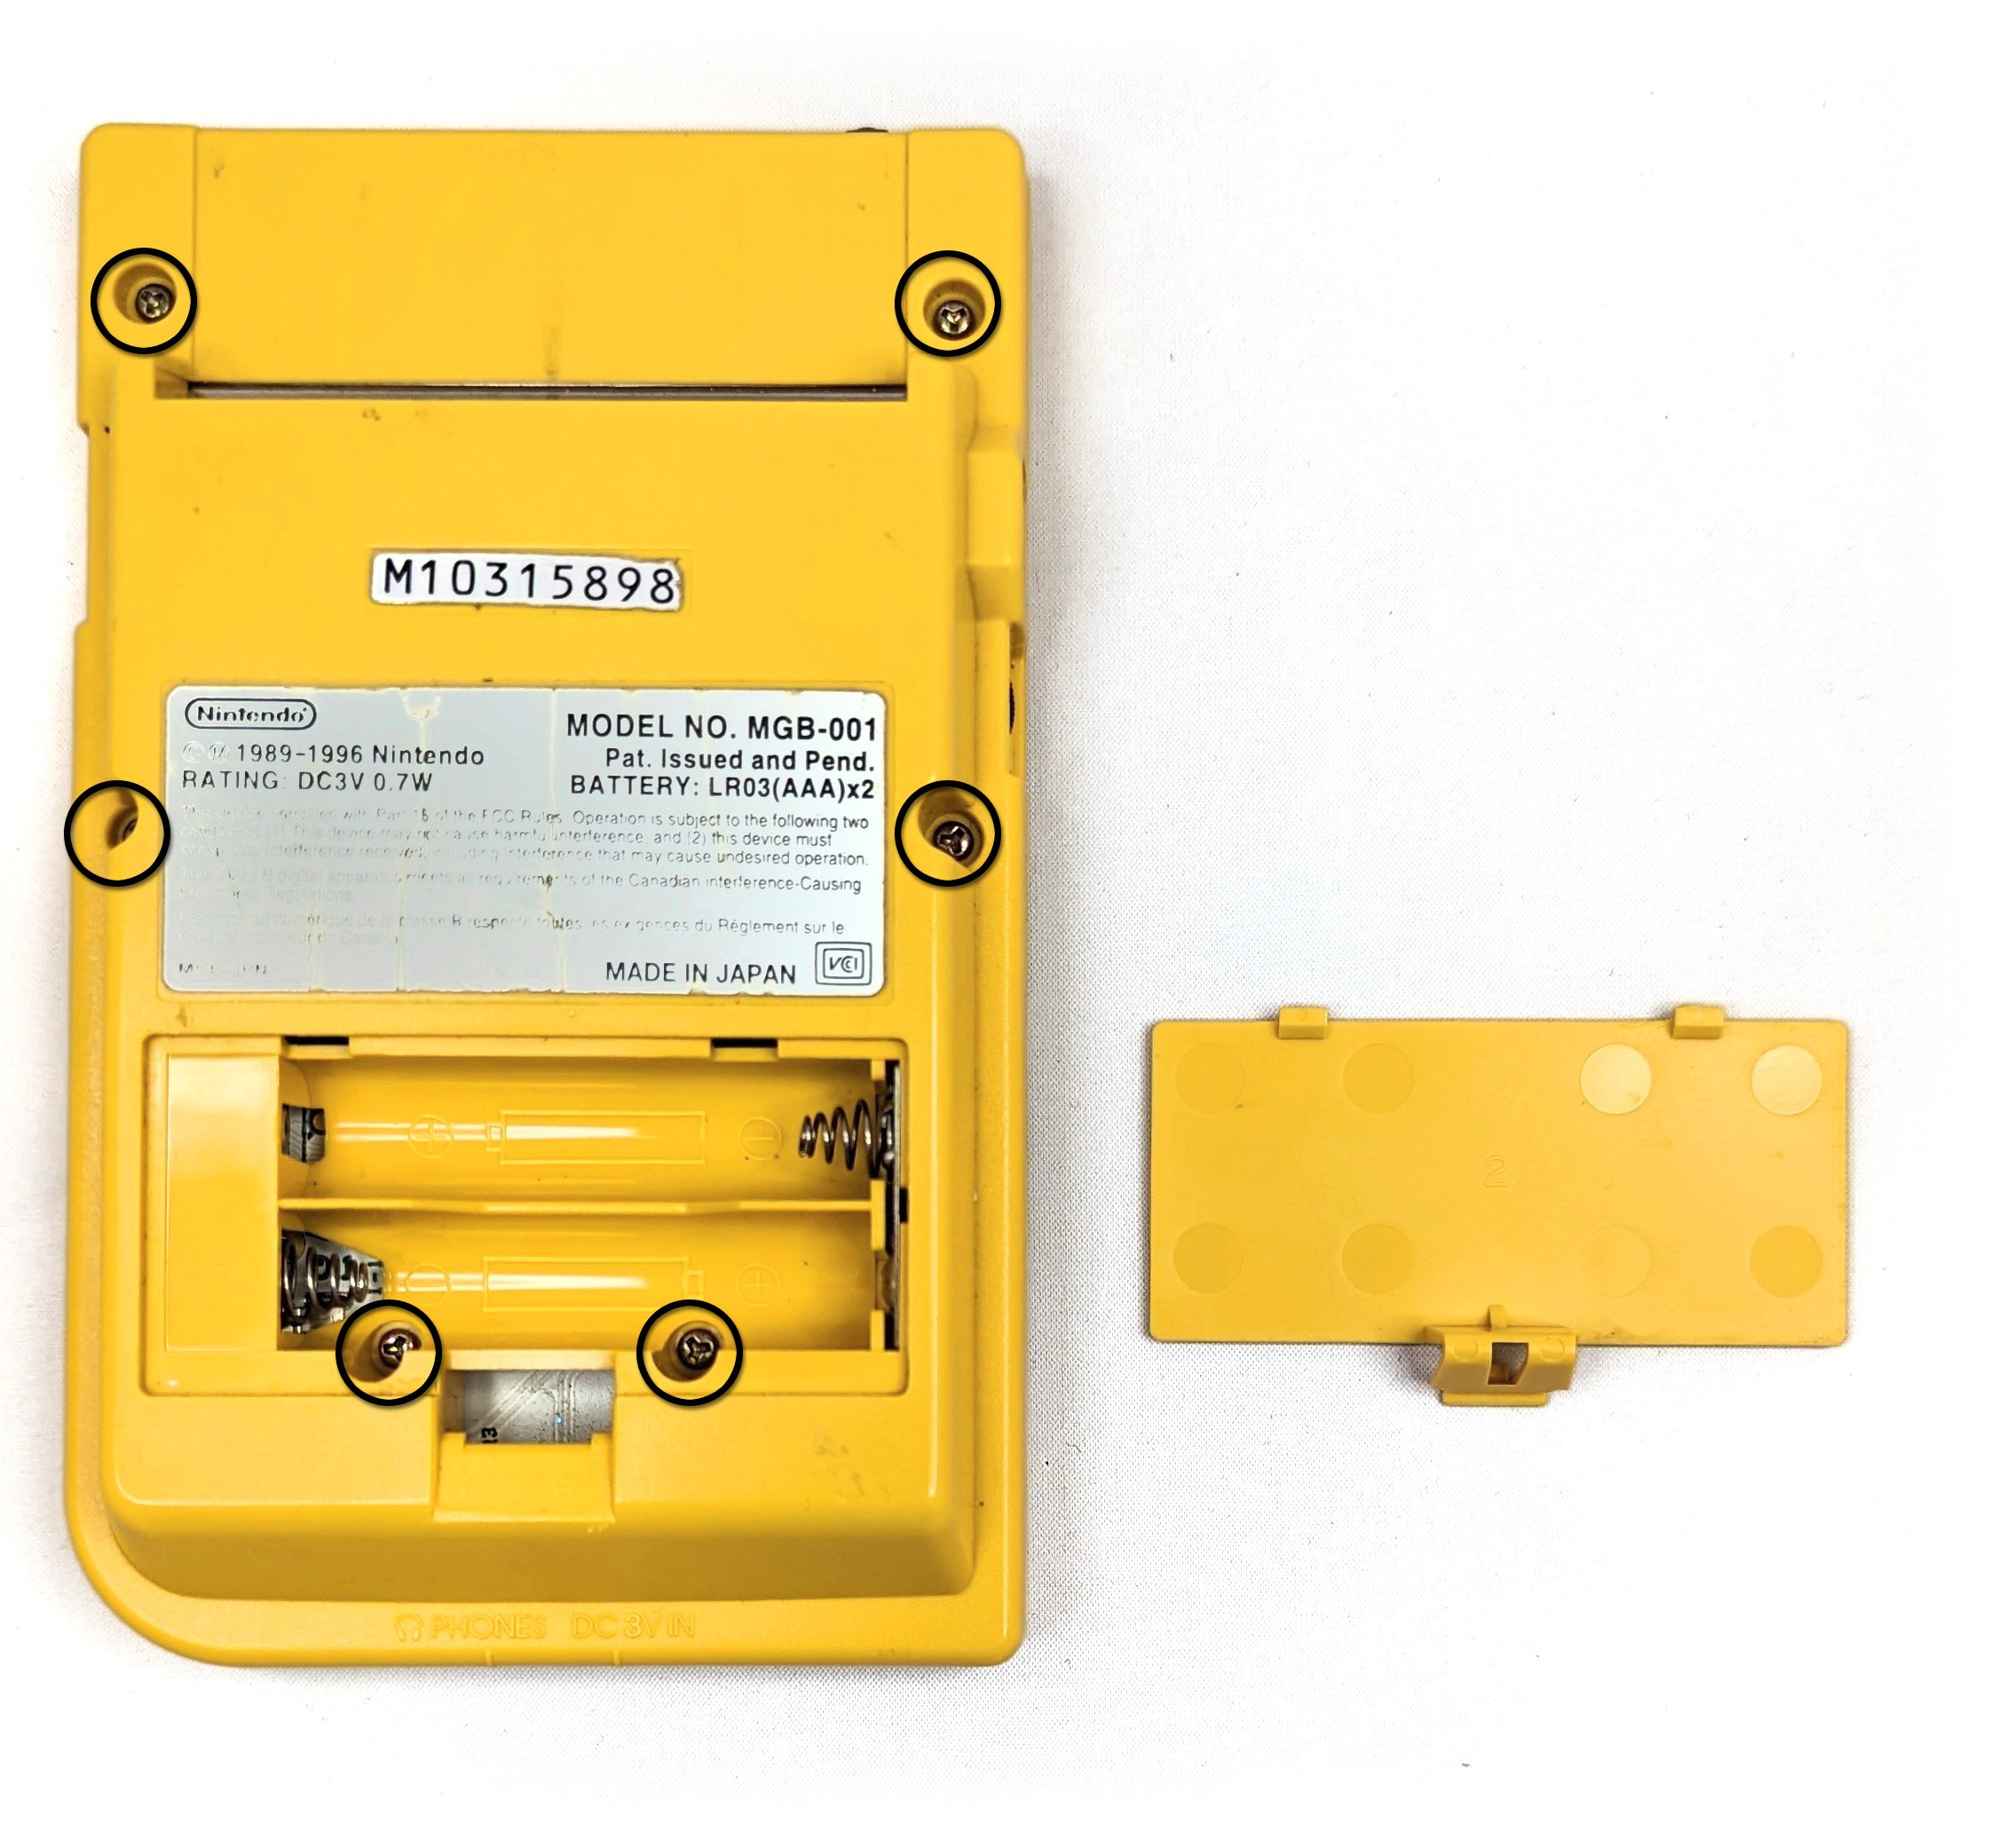
Remove with a Tri-Wing screwdriver

Remove with a Philips Head screwdriver
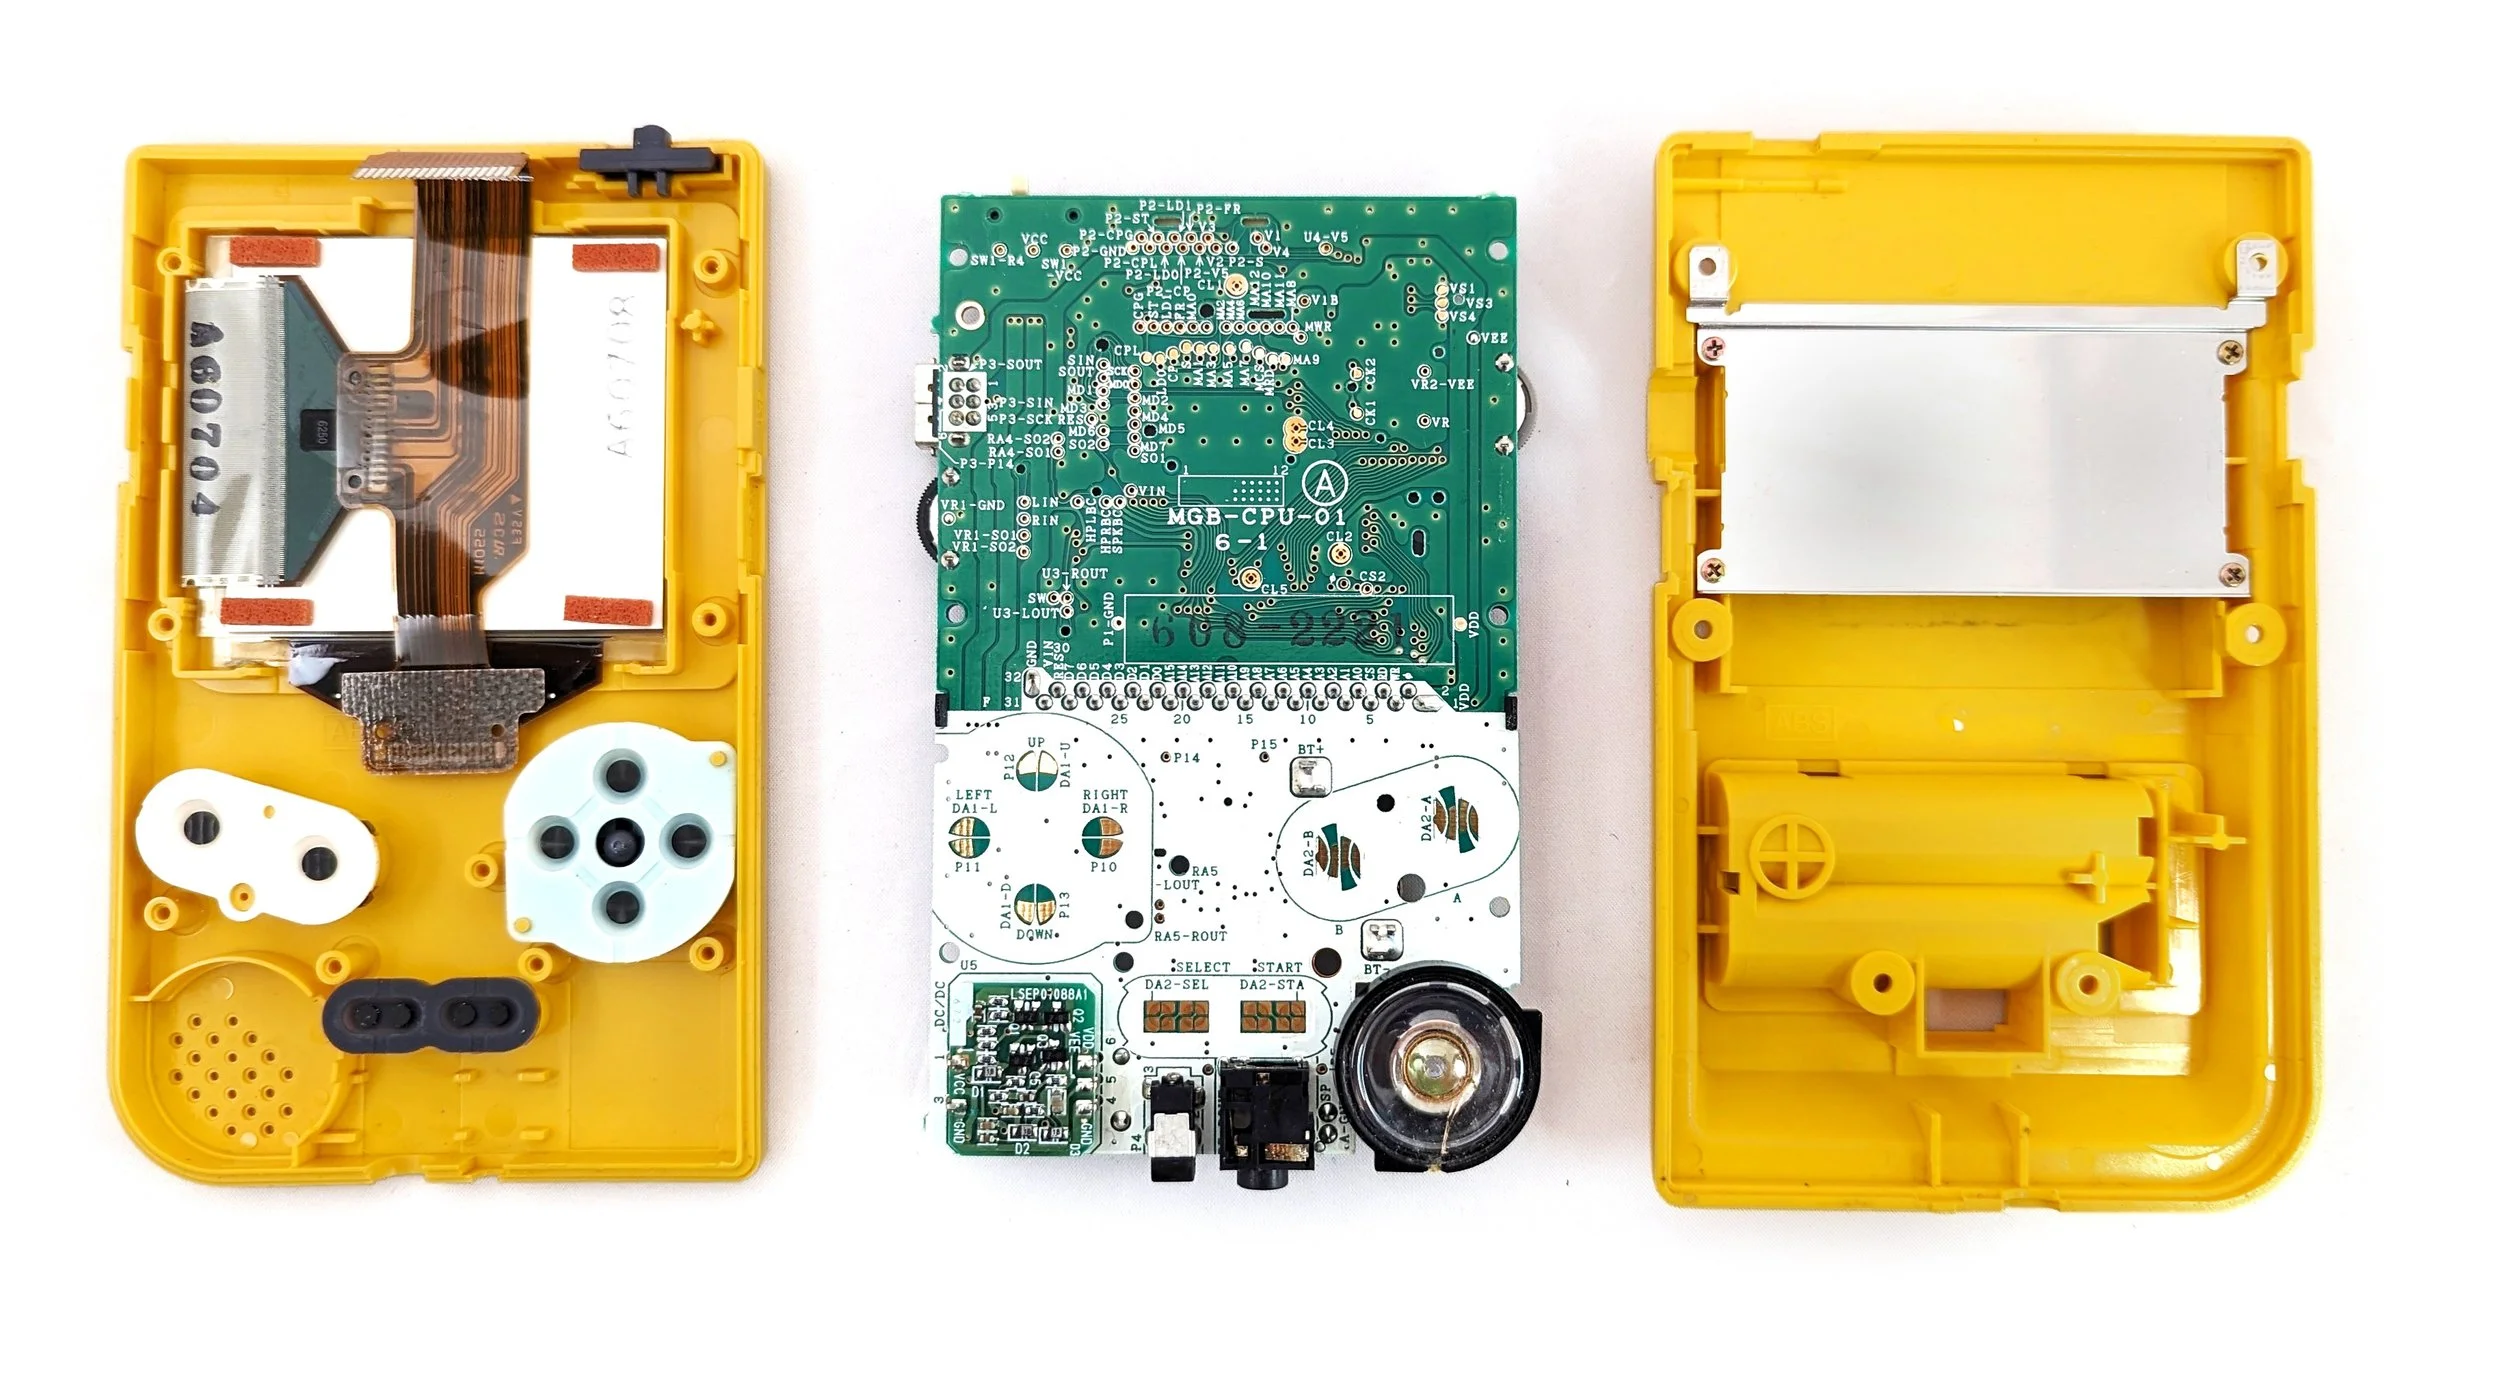
Switch to the Philips Head screwdriver to remove the three internal screws that keep the PCB fixed to the shell. Then, remove the cartridge shield from the rear shell and the buttons from the front shell and put them aside.
Note: we highly recommend placing the screws in a small container to keep from losing them!
Step 2: Clean the Game Boy Pocket
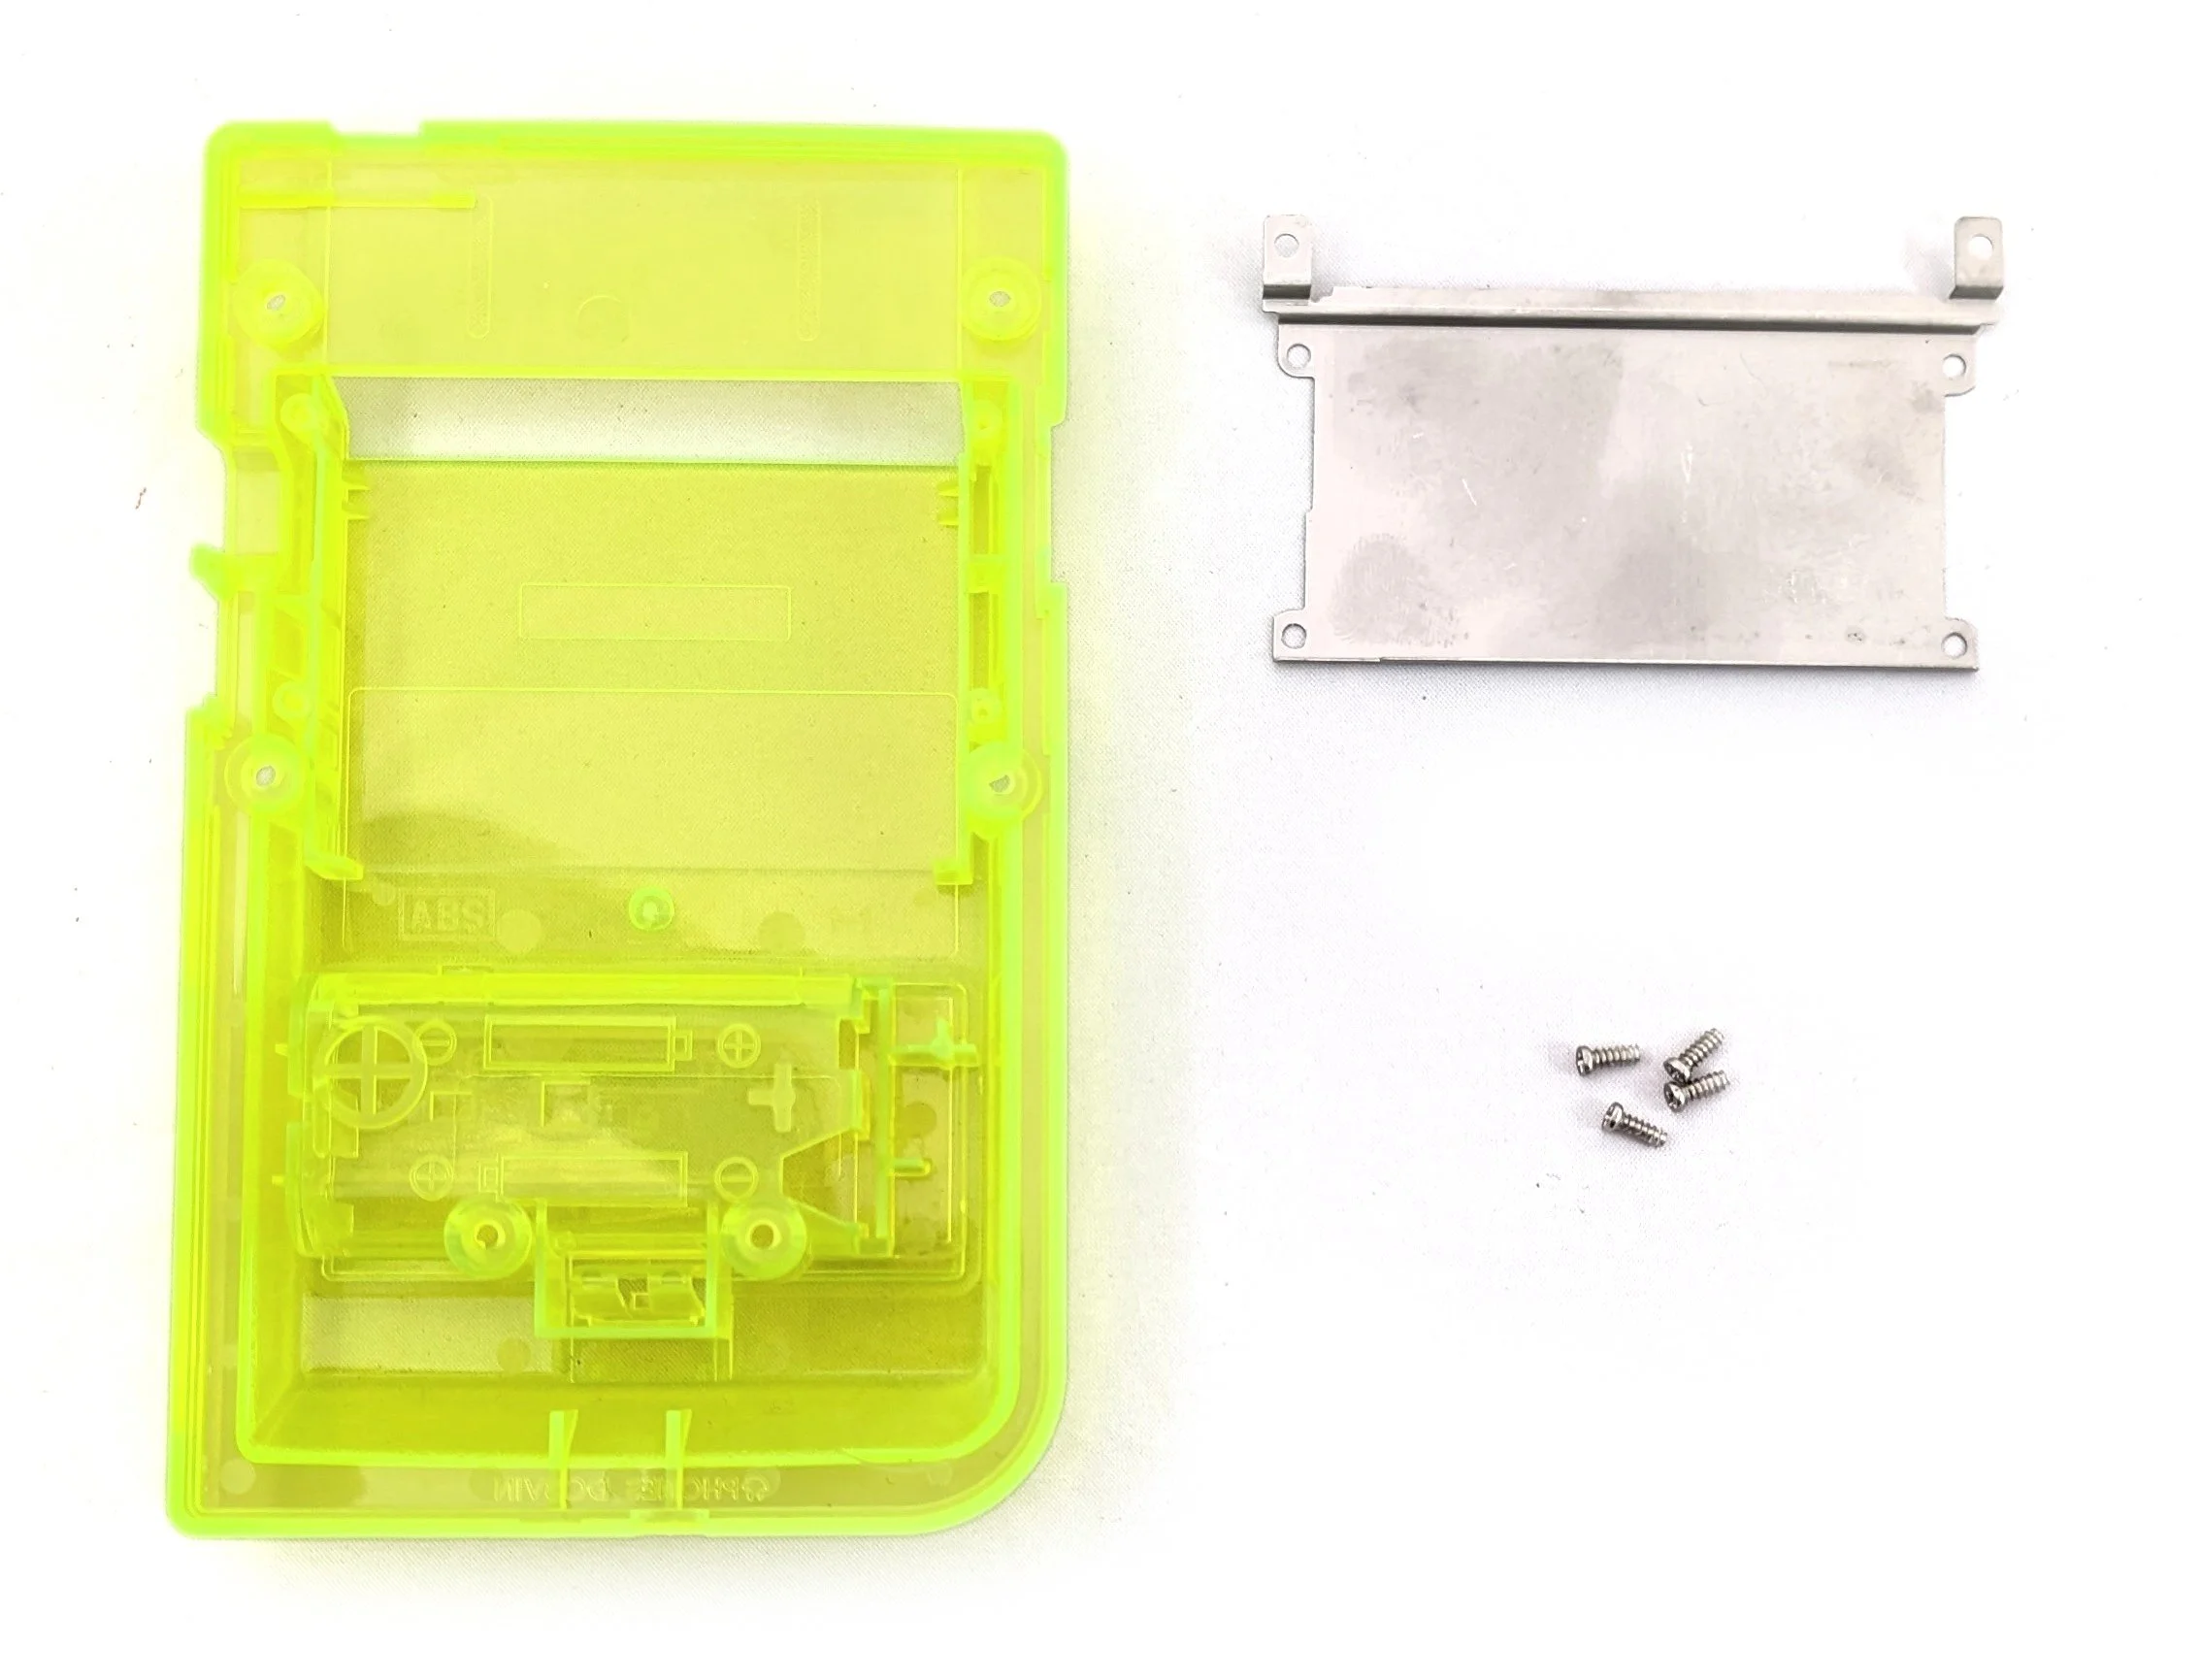
If you’re using the original case for the Game Boy, it’s probably worthwhile to take some time to clean out the dust, bugs, and detritus hiding inside. We skipped this step in our build because we decided to use an aftermarket shell to preserve the original for our research collection (and because transparent lime green is infinitely cool).
A note on plastic: shells in the Game Boy line are made of acrylonitrile butadiene styrene or ABS, a common form of plastic used in injection molding. We find that the ABS in the original equipment manufacturer (OEM) shells to be firmer and sturdier than the aftermarket plastic, which is more malleable and therefore easier to cut into. We recommend aftermarket shells for beginners. That said, some aftermarket shells are intended for screen mods and don’t have the same brackets around the screen, so be careful!
Before going ahead with the mod, make sure the system is clean. To do so, use a cotton swab dipped in rubbing alcohol and carefully wipe the PCB. Be careful not to get it inside the speaker. Use compressed air to blow dust and debris away.
Step 3: Remove Battery Posts and Plate
As our solar-modded Game Boy will no longer use AAA batteries, we must remove the battery posts (situated on the PCB) and the battery plate (embedded in the back shell) before continuing. If you’re using an aftermarket shell, you won’t have to worry about removing the battery plate since it usually comes packed separately.

The battery posts attached to the Game Boy’s PCB

The battery posts removed from the Game Boy’s PCB
The battery posts can be tricky to remove since they’re soldered to the PCB and slightly pronged. We also discovered that the posts accidentally serve as a heat sink, dispersing the heat from the soldering iron to the metal posts and consequently making it more difficult to melt the solder. The best strategy seems to be to apply heat to the back of the PCB while gently rocking the battery posts, one at a time, using a pair of small pliers. With some patience, you should be able to remove both and expose the contacts beneath.
Note: the battery posts will get extremely hot! Treat them as you would treat the soldering iron itself and don’t touch them with your bare hands. They’ll stay hot for a couple of minutes after being removed from the PCB.
The battery plate is much simpler to remove. It’s not affixed to the plastic shell and can be extracted with a pair of fine pliers and some elbow grease.

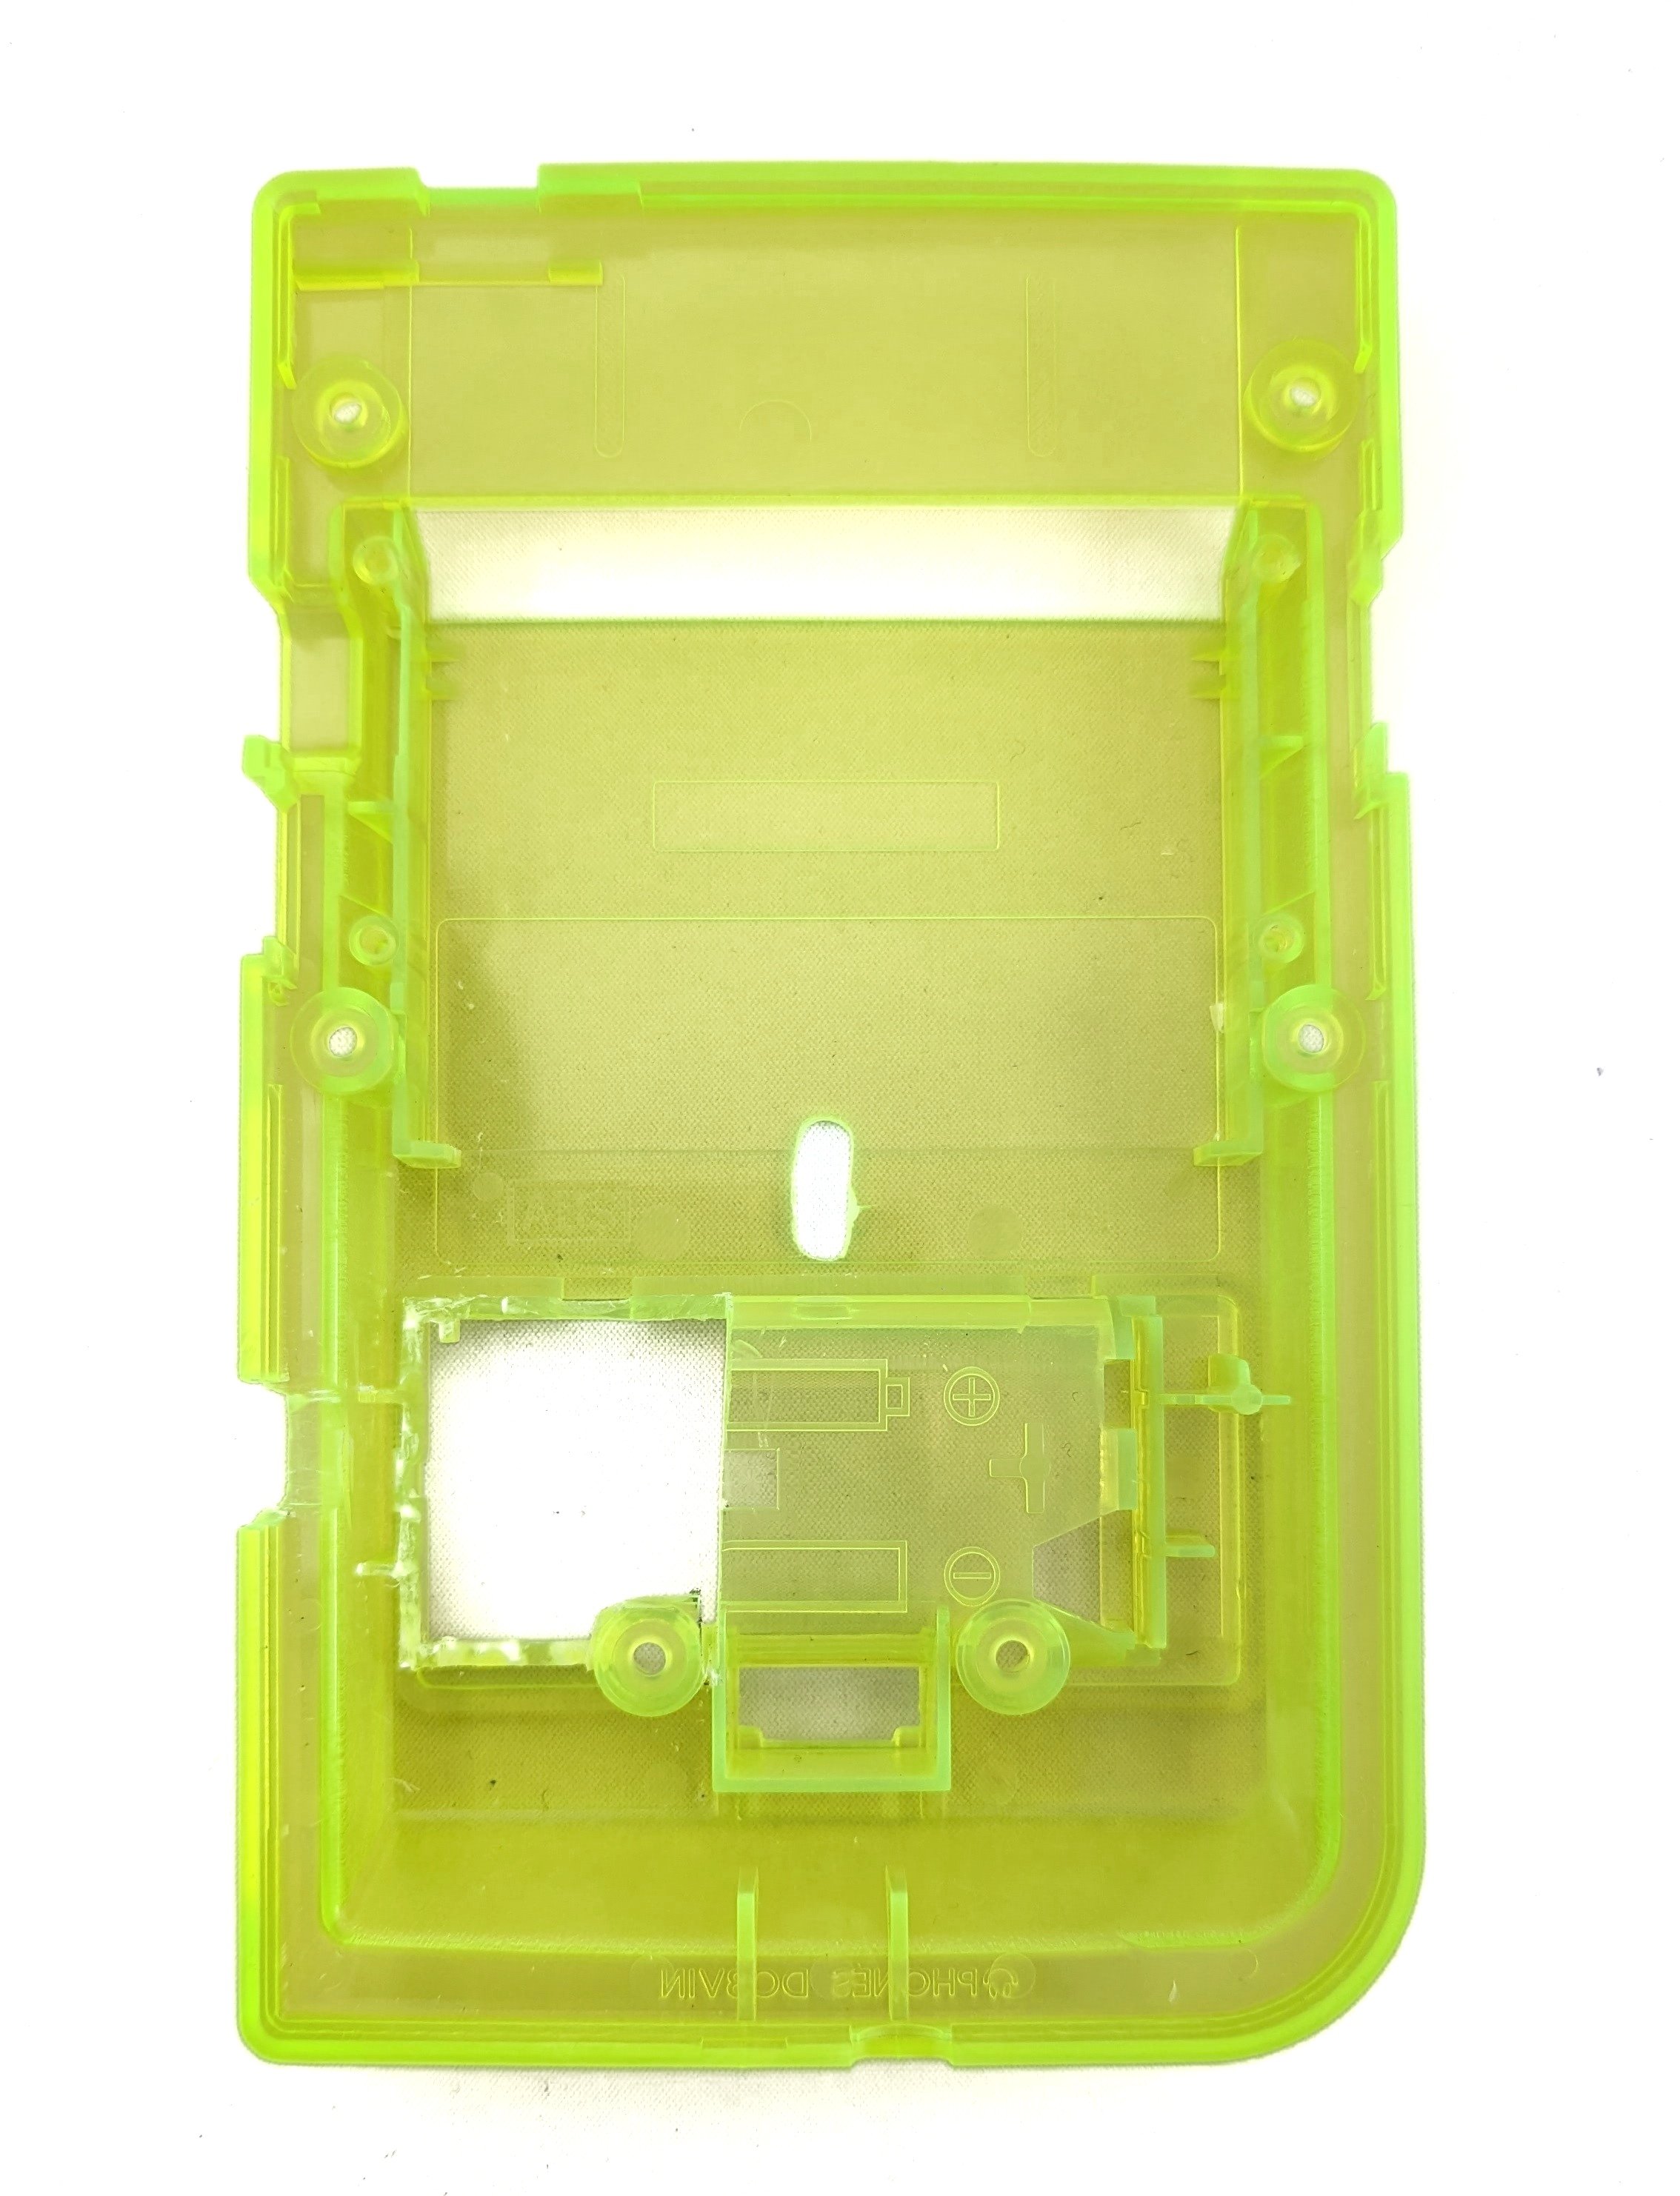
Step 4: Modify the Game Boy Pocket’s Rear Shell
We’re adding new components into the Game Boy, so it’s necessary to alter the rear shell to make space and create cable pathways. As the solar panel will cover the back of the modified Game Boy, it’s not necessary for these cuts to be overly tidy—with the important exception of the hole for the charge controller’s USB port. There are numerous places that the charge controller can be situated, but, in this tutorial, we document our attempt to nest it above the lithium battery.
Note: if you’re using a transparent shell, as we are here, your work will be much more visible. Choose an opaque shell if you don’t want to worry about clean cuts. The tradeoff is that clear shells make it easier to see where you need to make the cuts.
There are three main shell alterations we have to make:
Removing the left section of the battery slot to make space for the charge controller.
Adding a slot in the middle of the rear shell to allow the cables from the solar panel to reach the charge controller.
Creating a notch on the side of the rear shell for the charge controller’s USB-C slot to stick out.
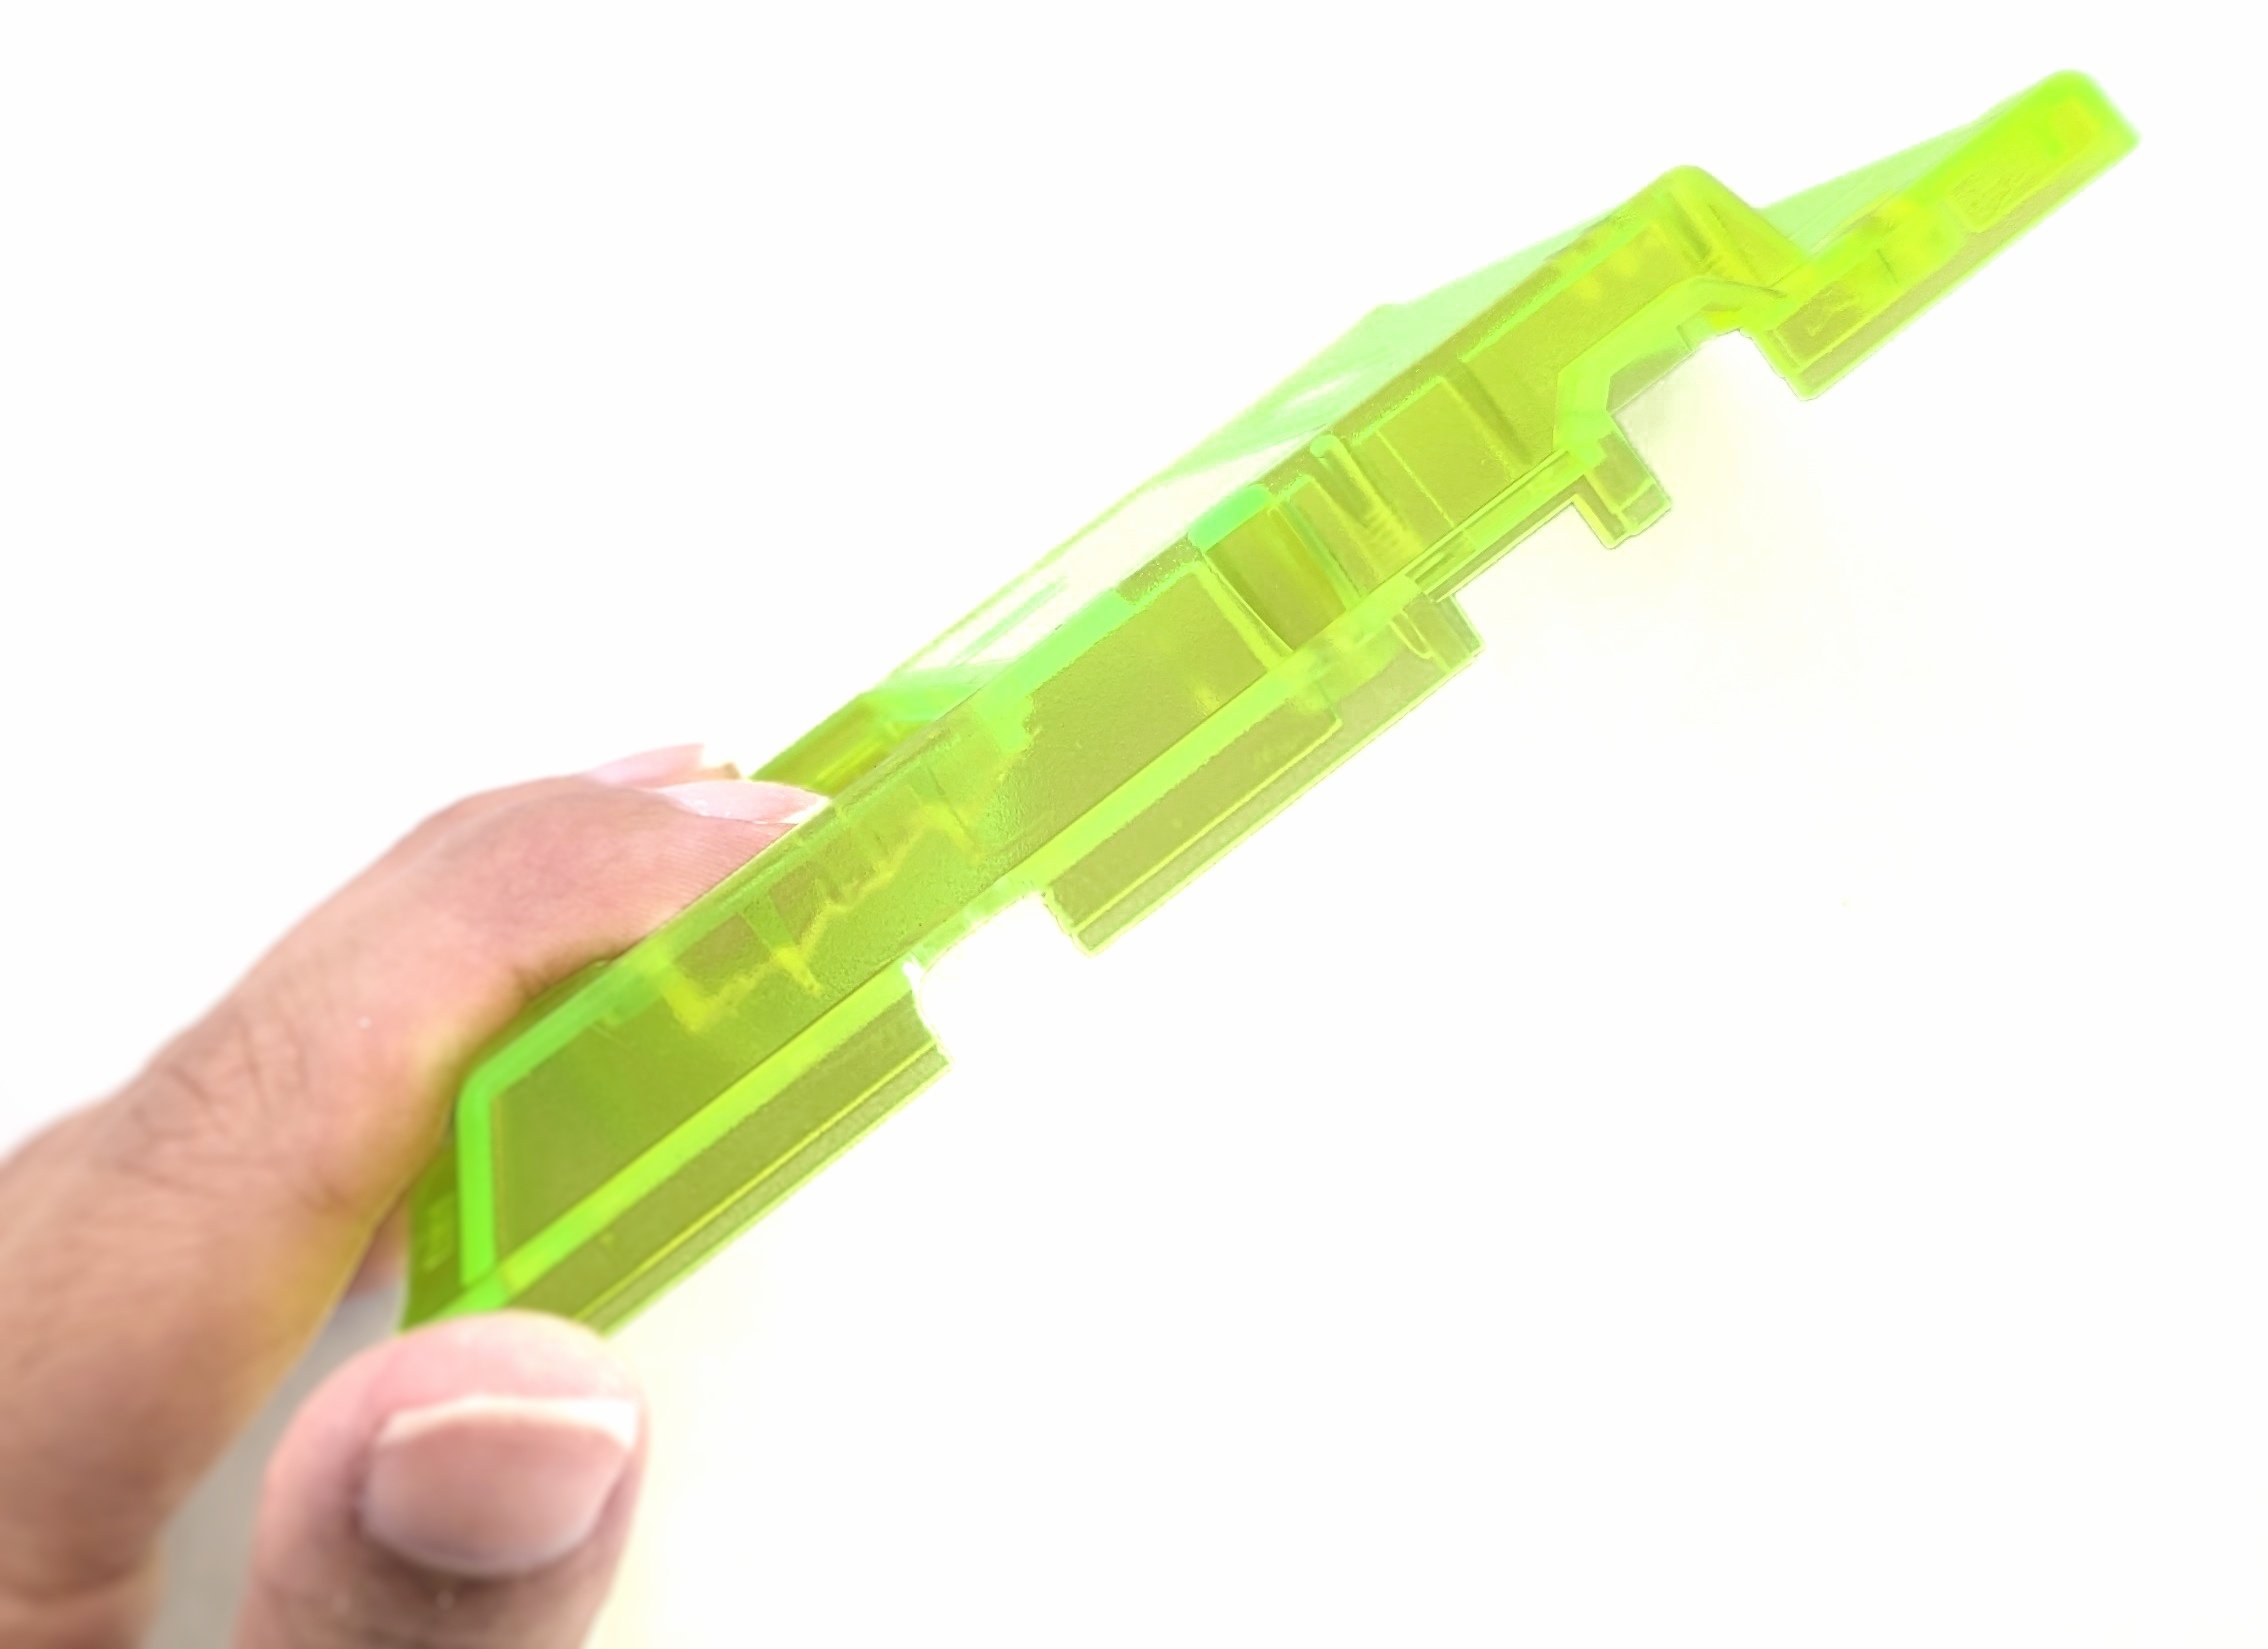
You should use a Dremel or similar tool to carefully carve out the left section of the battery slot. The objective is to remove as much as you can without compromising the integrity of the screw post—it will help hold the Game Boy shut once we have the components inside. Flush cutters are useful for precise cuts and a file, sander, or sharp knife are invaluable for smoothing out edges.
After being cut with a Dremel, the plastic can be a bit jagged

Use a sharp knife, sander, or file to smooth things out
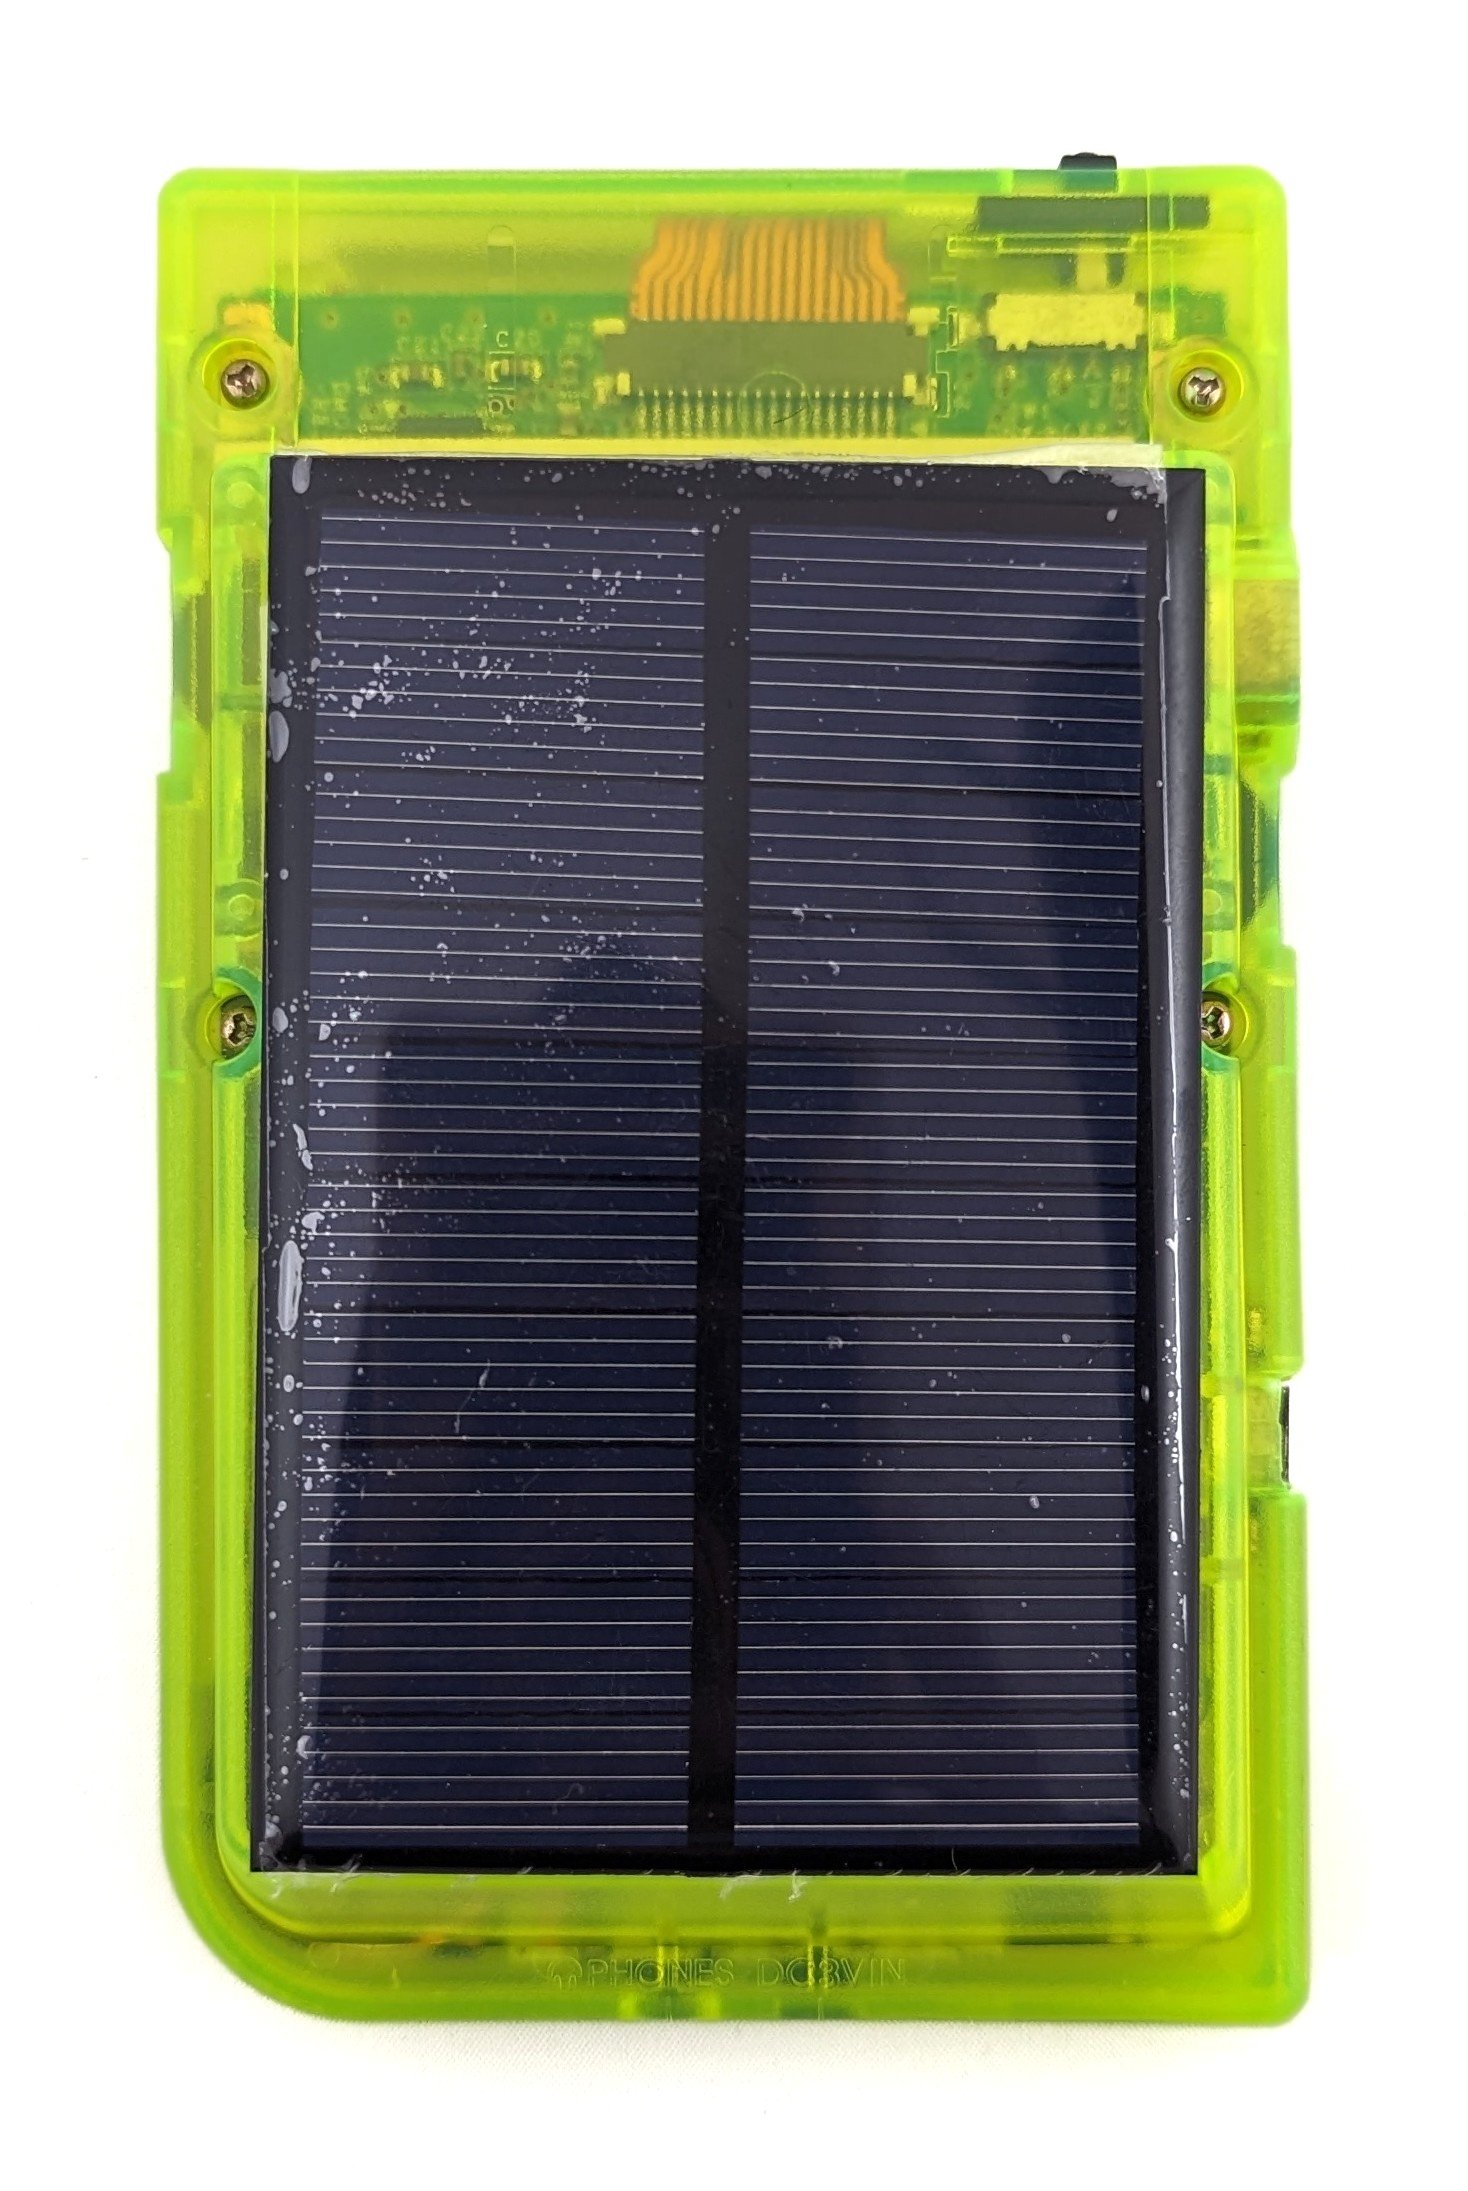
The slot in the back shell should be cut right where the solar panel’s contacts are located. In the case of our panel, this was above the battery slot. The simplest method to accomplish this is to drill a few holes through the shell using a medium-sized drill bit, then expand the slot as needed using a sharp knife.
Place the solar panel against the rear shell to make sure the contacts are visible with some space to spare.

The side notch for the charge controller’s USB-C slot is perhaps the most difficult cut you’ll have to make. Carefully make the initial cut using the Dremel’s disc attachment, frequently checking the size with the charge controller.
Step 5: Fit Check
Before moving on to soldering, take a moment to consider your overall build and see if all of your elements will fit when the case is closed. This step is important as it’s your last opportunity to make significant changes to the Game Boy Pocket’s shell before the soldering phase. It’ll also give you an idea of how long your wires will need to be.
“This placement will make the case bulge a bit. You can try to find an alternative location to place the charge controller and port or, as we did with our initial mod, forgo an outward-facing USB-C port to make this a purely solar-powered device.”
Based on our experience completing this mod, you’ll likely have to cut the notch for the charge controller’s USB-C port a bit deeper (i.e. further down into the case) than you think—the slope of the shell and the placement of the PCB creates quite the competition for real estate!
If you’re comfortable with the fit, re-attach the cartridge shield to the rear shell.
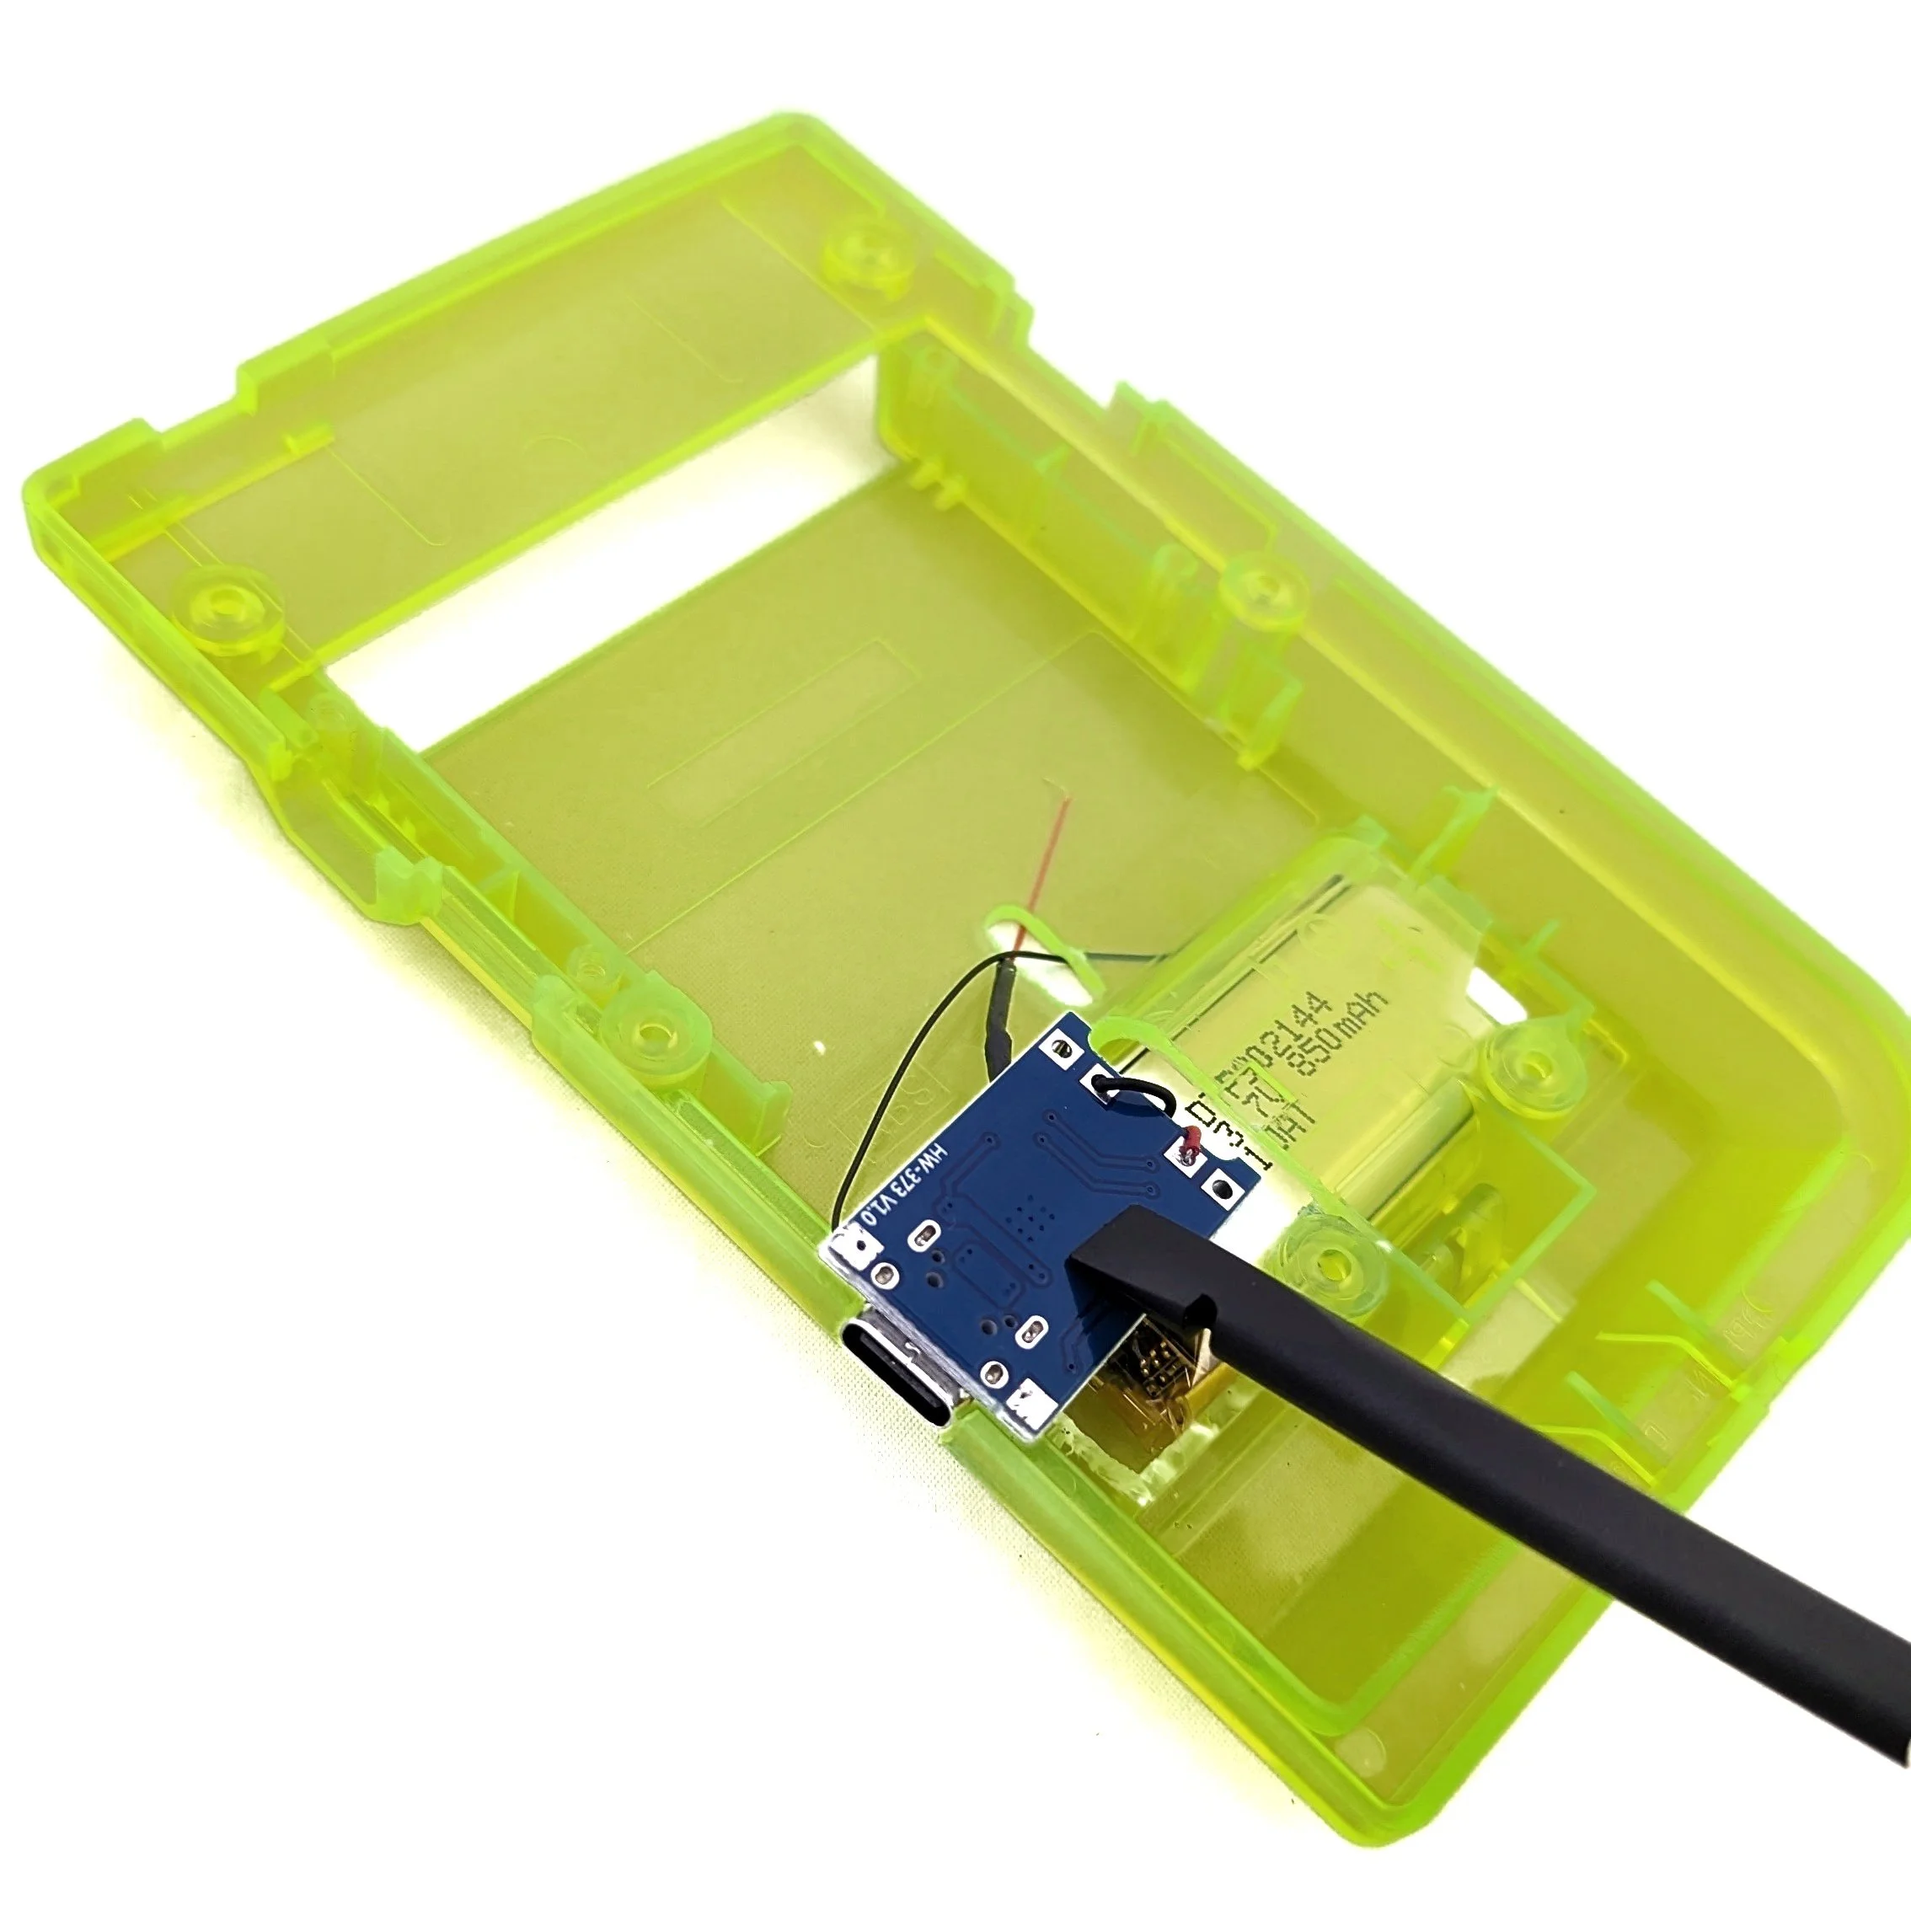
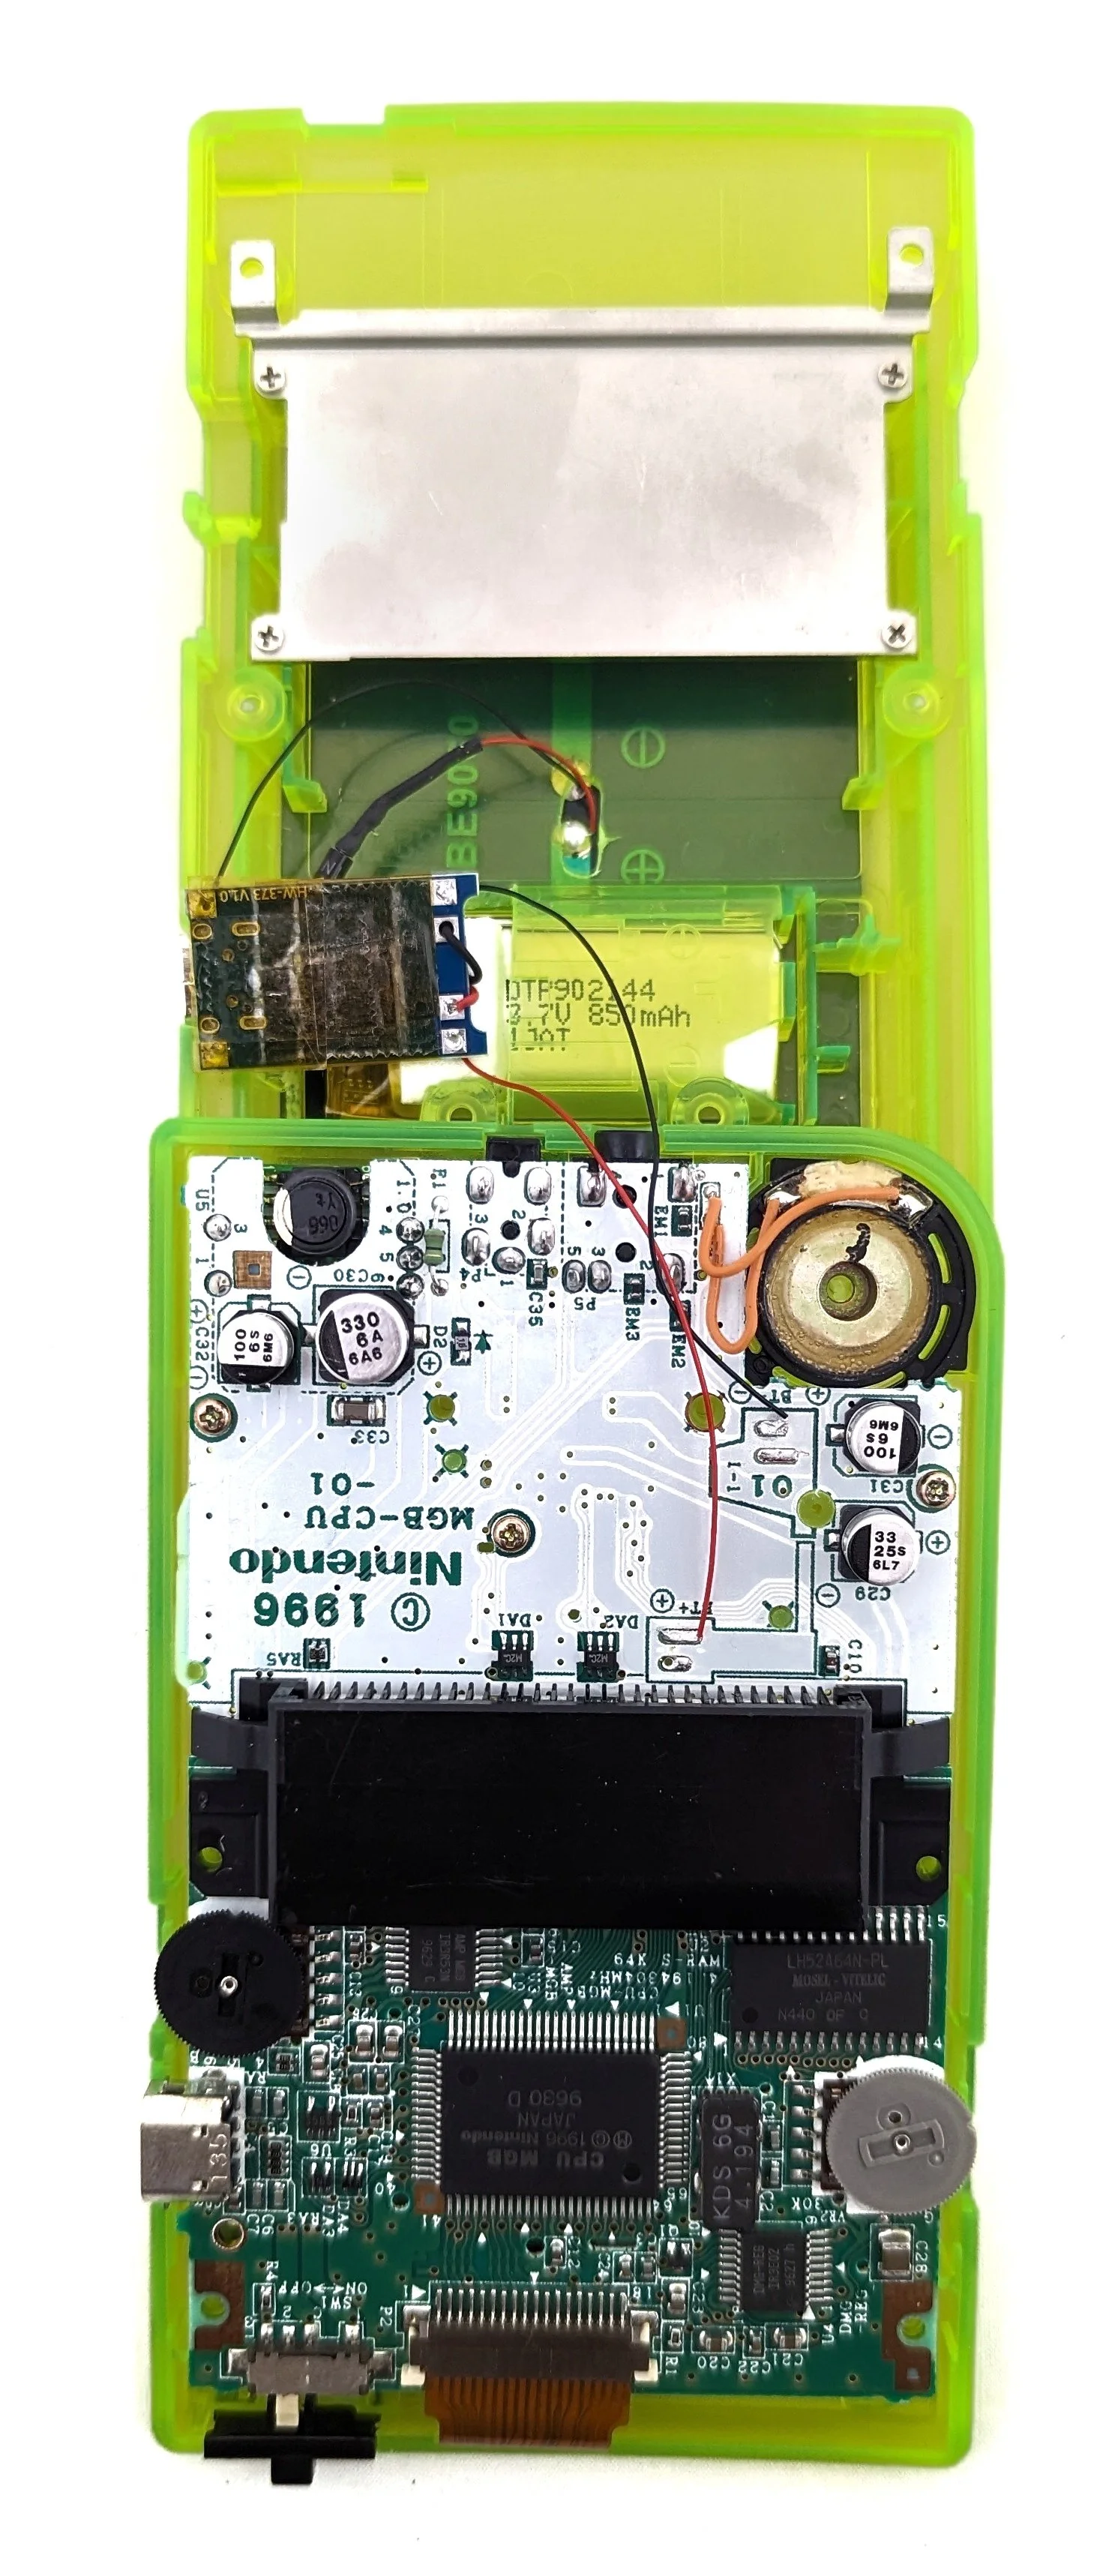
Step 6: Soldering
The diagram below outlines where different components need to be soldered for this mod to function properly. Red and black lines indicate where wires should be placed and represent positive and negative charges.
The wires, when soldered into the charge controller, will cause it to take up more space. We recommend using a very fine gauge wire and leaving a little extra space within the case to accommodate it.

Step 6.1: Solar Panel to Charge Controller
The first step is to connect the solar panel’s two contacts (negative and positive) to the charge controller. The negative contact of the solar panel can be hooked up directly to the negative input on the charge controller.
The positive contact of the solar panel, however, must first connect to a diode that will prevent energy from flowing back into the panel. We recommend placing the diode between two bits of wire for flexibility, then using heat-shrink to insulate it. The silver end of the diode should face toward the charge controller.
Note: It is important to feed the wires through the rear shell of the Game Boy before soldering. It won’t be possible to feed the charge controller through after the fact.
Step 6.2: Battery to Charge Controller
Next, cut the white adapter from the lithium battery and strip the red and black coating to expose the wires within. Solder these wires to the slots on the input contacts on the charge controller, labelled “B+” (red) and “B-” (black).
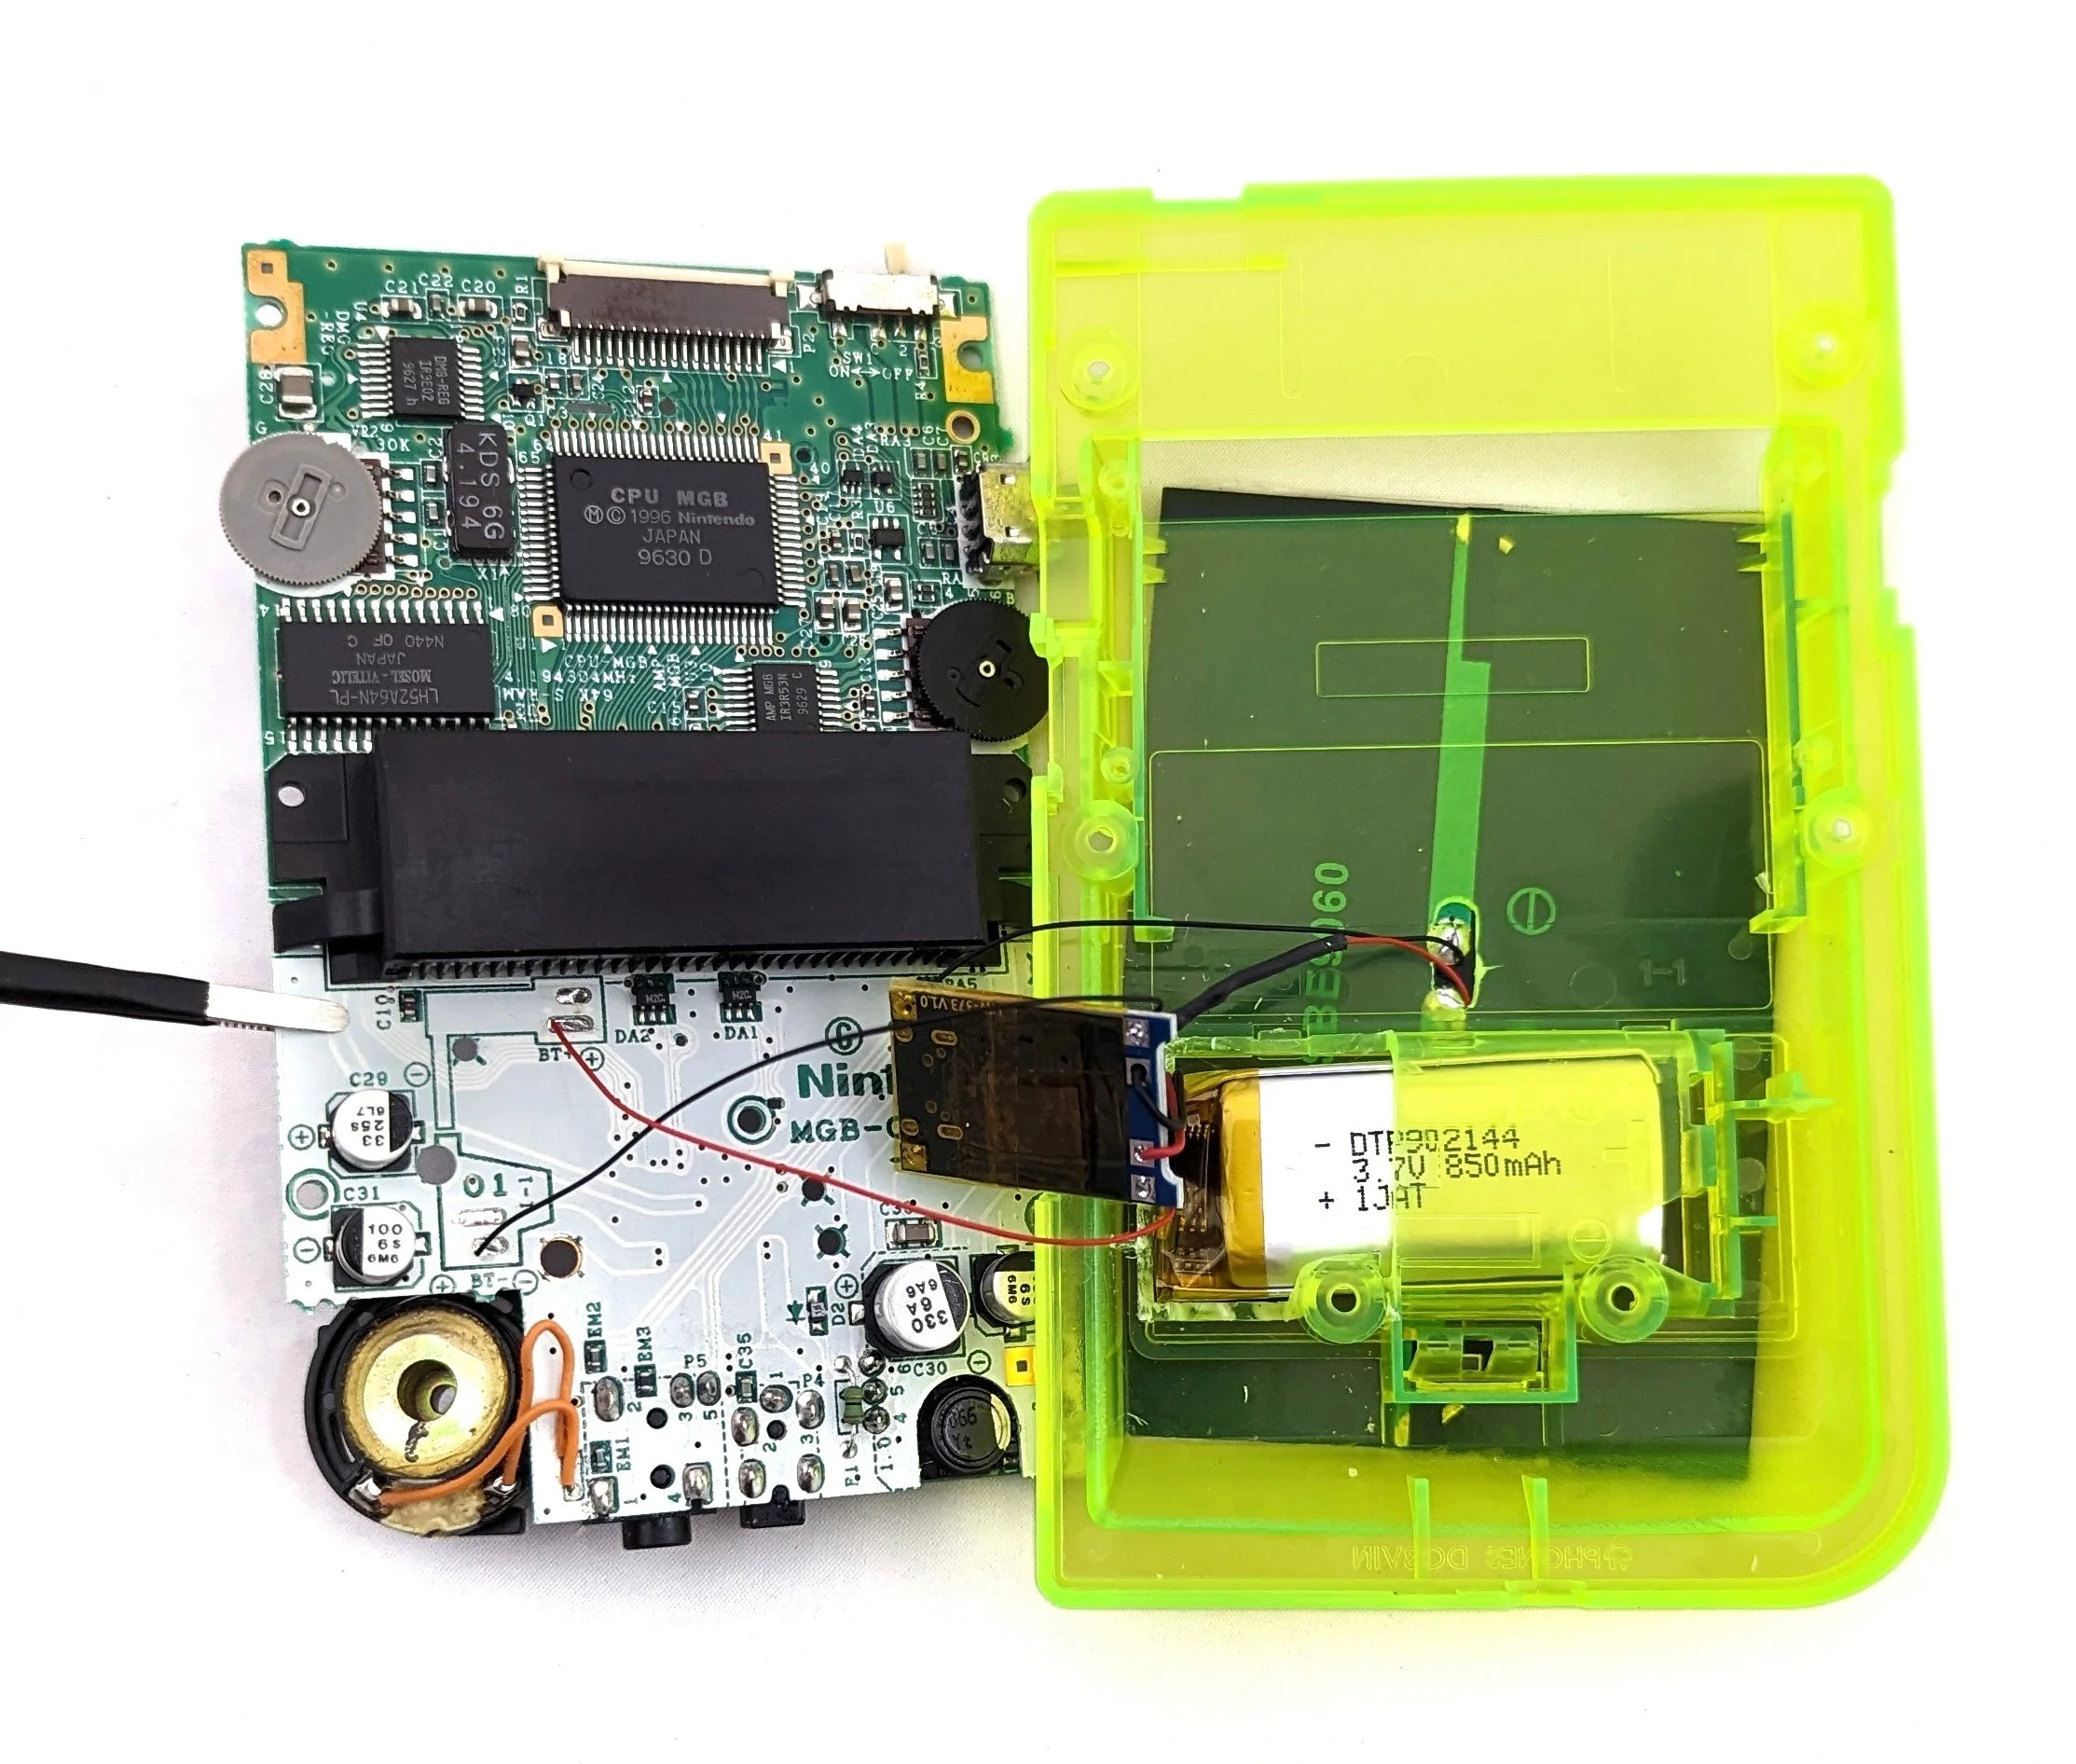
Step 6.3: Charge Controller to Game Boy PCB
Finally, connect the remaining two slots of the charge controller to the Game Boy PCB using short lengths of wire. You’ll be soldering the wires to where the battery posts were removed, labelled as negative (-) and positive (+) on the board.
Step 7: Final ADjustments
Before you close the shell permanently, now is a good time to check that all your components and wires fit together. This is the trickiest part of the build! You may have to re-arrange elements slightly or even carve out more space inside the Game Boy before proceeding.
Once you’re confident everything will fit and that your wires are placed correctly, apply Kapton tape to any exposed electrical components that may be in touch with other electrical components. Kapton tape is an insulator and will prevent short circuits! We recommend fully covering the top and bottom of the charge controller as it’ll be sandwiched between the Game Boy’s PCB and the lithium battery
It’ll also likely be necessary for you to apply double-sided tape to keep elements in place during reassembly (and to prevent them from jostling around afterward). Double-sided tape works well as a stabiliser, especially for securing the charge controller on top of the battery. As you’re affixing elements in place, do quick checks to make sure that everything is still lined up properly.
Step 8: Reassembly
Now that you’ve determined everything will (more-or-less) fit inside the Game Boy case once it’s closed, it’s time to carefully put things back together. Essentially, we’re working through the instructions listed in Step 1 in reverse, while attempting to juggle several new components without breaking or shifting them around.
Place the removed buttons and silicone pads in the front shell.
Screw the PCB to the board using the Philips Head screwdriver (be mindful of the speaker, which sometimes needs to be rotated to fit back into place).
Close the shell using the Tri-Wing screwdriver.
Note: We recommend affixing the USB-C port of the charge controller to the side of the case with superglue or something similar so it doesn’t slide loose.
It’s possible that your Game Boy case may bulge a little. If you’re not okay with this, you might want to re-open it and try to expand the hole the USB-C port is poking out of. We also recommend taking some time to test the Game Boy to see if all the connections are holding; simply turn it on and see if it powers up.
Once you’re happy with the fit, use a small amount of superglue to affix the solar panel to the back of the Game Boy Pocket. It should nest perfectly with only a few millimetres overlapping the cartridge slot.
Step 9: Enjoy Your Solar Game Boy Pocket
You solar-modded your Game Boy Pocket! Celebrate by prancing in the sunlight!
To test your solar Game Boy, let the battery drain completely and then leave it on a sunny windowsill for 4-6 hours. If it powers up afterwards, the mod is successful.

A previously modded solar-powered Game Boy soaking up some rays
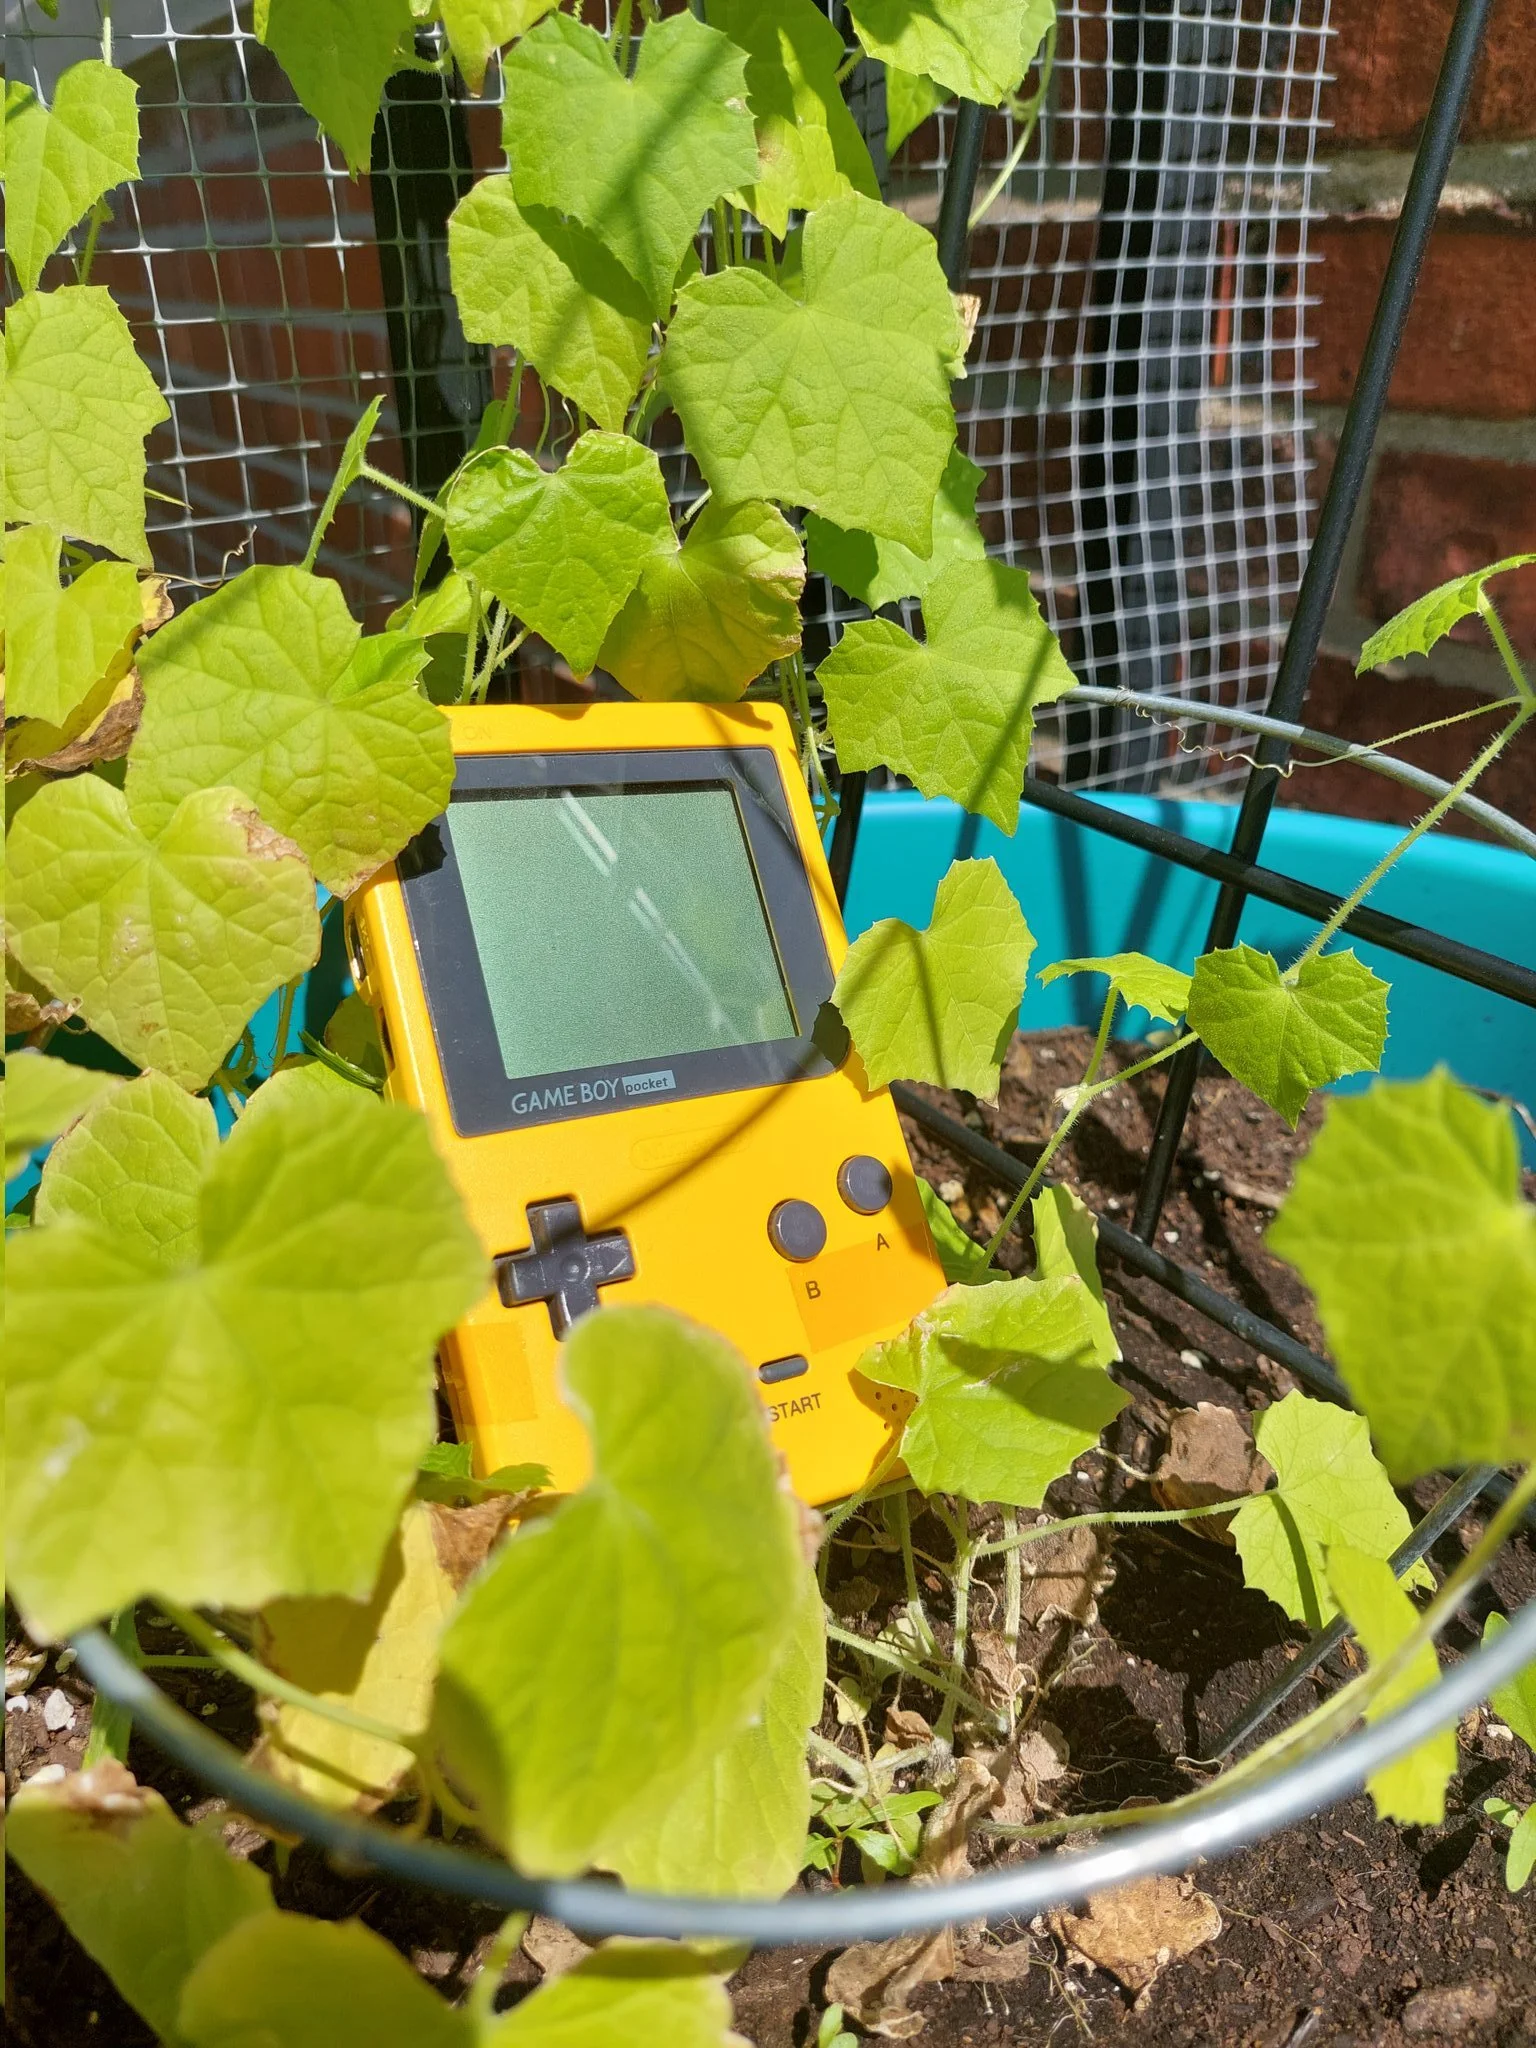
Please don’t get dirt in your Game Boy
Final Verdict
We have some extremely mixed feelings about this mod. On one hand, it gestures toward alternative energy futures by shedding AAA batteries in favour of a rechargeable battery and a photovoltaic panel. On the other hand, it requires the purchase of so many new pieces of equipment that it likely erases any environmental benefit the device would bring about. The result is a contradictory device, simultaneously hopeful and wasteful.
We’re also conflicted in regard to this mod’s value as a workshop or class activity. While it poses numerous productive challenges to the modder—specifically related to soldering, case-modding, and bypassing technical protection measures—it is tremendously finicky and the final result is often imperfect. Other mods typically offer clear hardware upgrades, but this one is more of an experimental piece that is not designed to solve a problem.
As a final note: we have decided to continue our tradition of naming our modded Game Boys. We dub thee Skyler, to both acknowledge your radical nineties aesthetic and the blue skies from which you draw your energy.